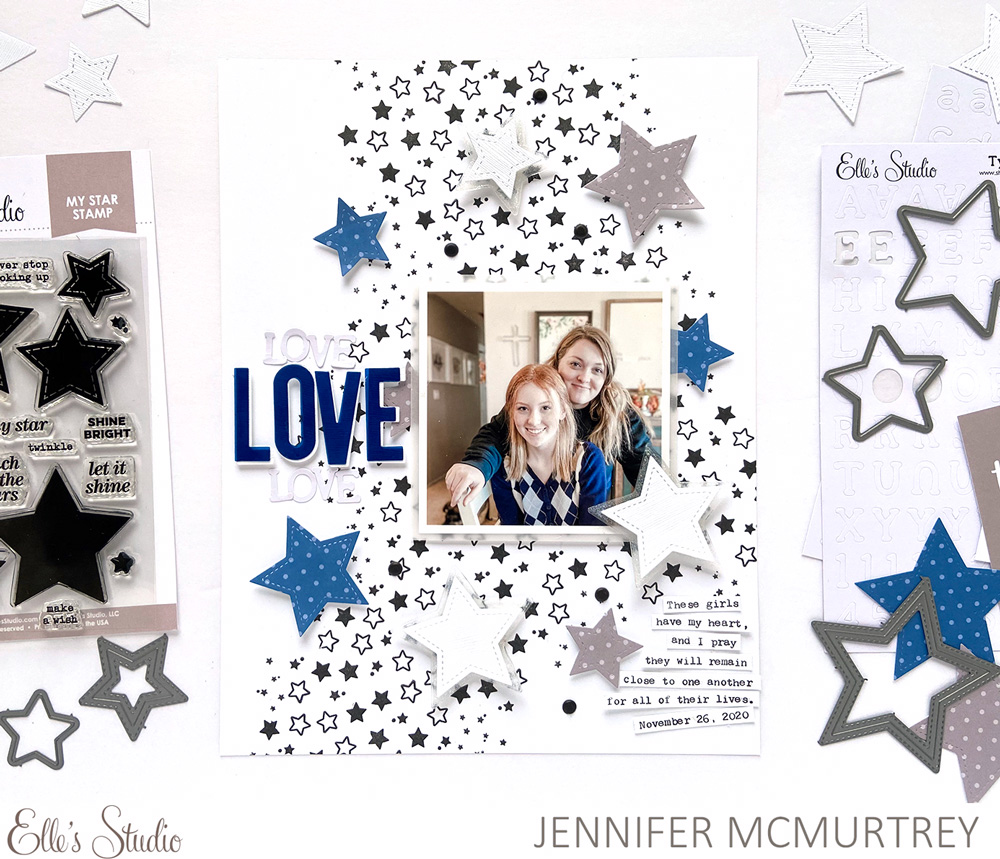
Hello, Elle’s Studio friends! It’s Jen here today sharing a project created with the new My Star Stamp and My Star Metal Die, which are quickly becoming a go-to staple in my craft stash. I love the versatility they provide when I am crafting and that they can be used on any type of project.
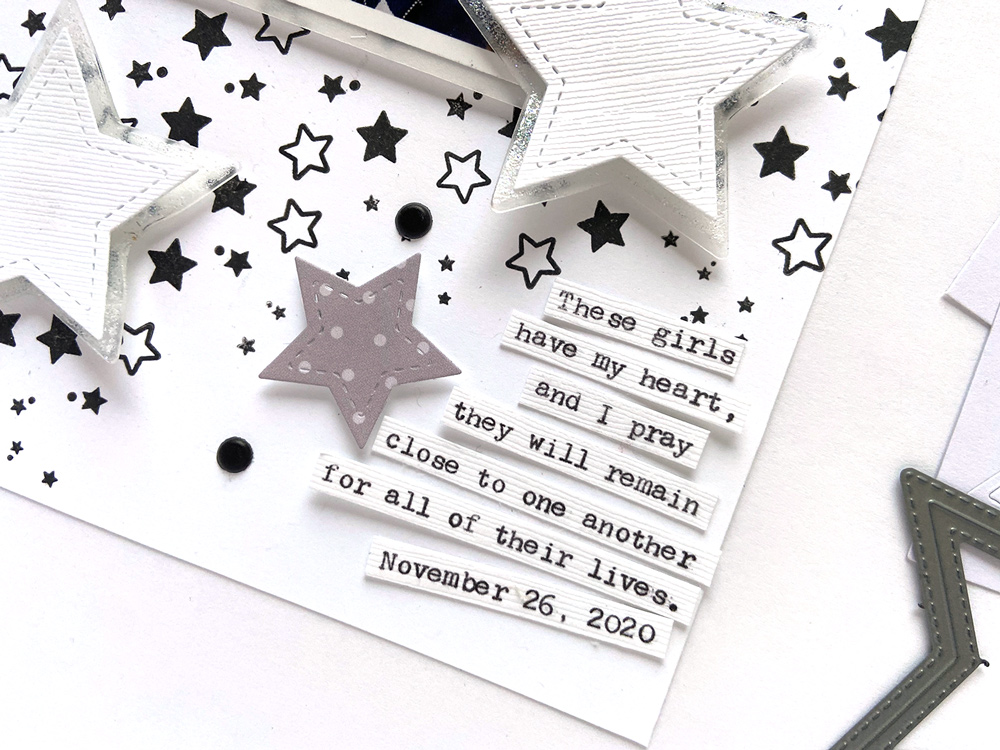
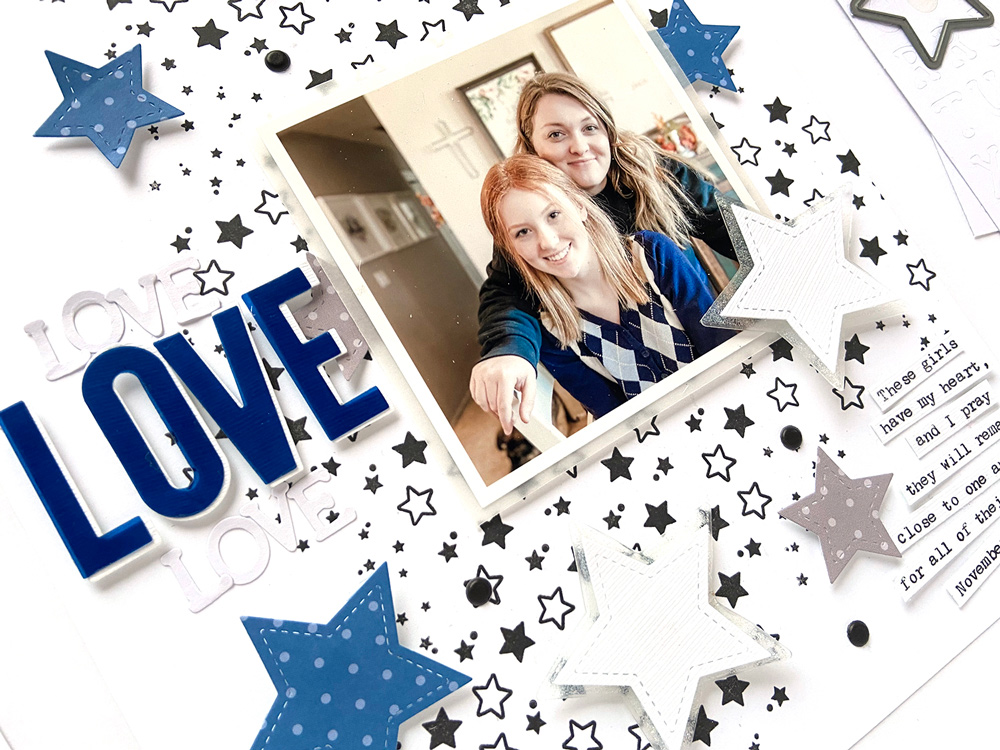
It isn’t often that we are all together as a family (especially these days), so I make sure to snap lots of photos when we are. This picture of my daughters makes my heart so very happy—there is a nine-year difference between the two, but you’d never know because of how close they are.
Supplies | White Typewriter Cardstock Alphabet Stickers, Navy Acetate Alphabet, Christmas Tiny Shapes and Dots Puffy Stickers, Jewel Polka Dot 6 x 8.5 Inch Paper Stack, My Star Stamp, My Star Metal Die, Large Jane Alphabet Metal Die
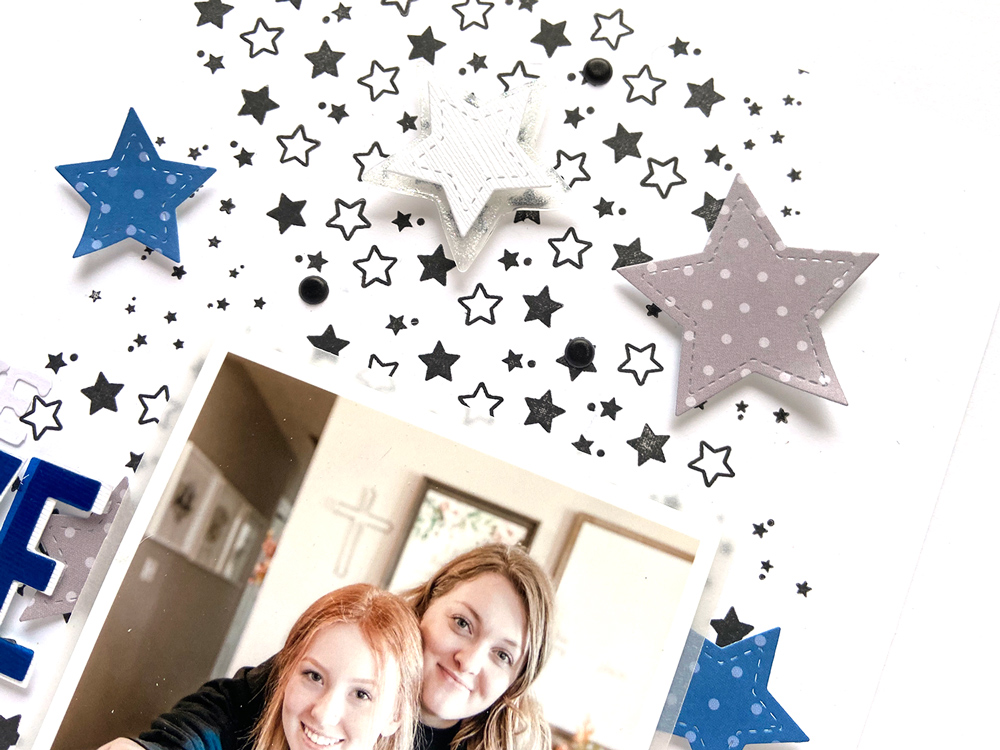
For this project, I used smooth, white cardstock for the background that I stamped with the My Star Stamp. Per usual, I had a completely different look in mind when I started the layout but am happy with how it turned out. I used three stamps to create the larger stars and followed those with smaller ones around the outer edge of the stamped images.
Because I wanted to keep the color scheme simple, I chose to back the photo with clear vellum before adhering it with foam squares. This gives it a bit of depth without being to overwhelming.
The My Star Metal Die were next, and here is where I tried to get fancy. Recently, I purchased “shrinky dink” die cut paper and had yet to use it, so I figured now was as good a time as any. After cutting one of each of the three sizes of stars, I stamped them with embossing ink, and coated them with white sparkly embossing powder. Next, I heat embossed each star – this was tricky because I didn’t want the stars to lose their shape. It took a few tries, and more stars, but I was finally able to get the look I wanted. These three stars were topped with white die cuts and adhered with foam squares.

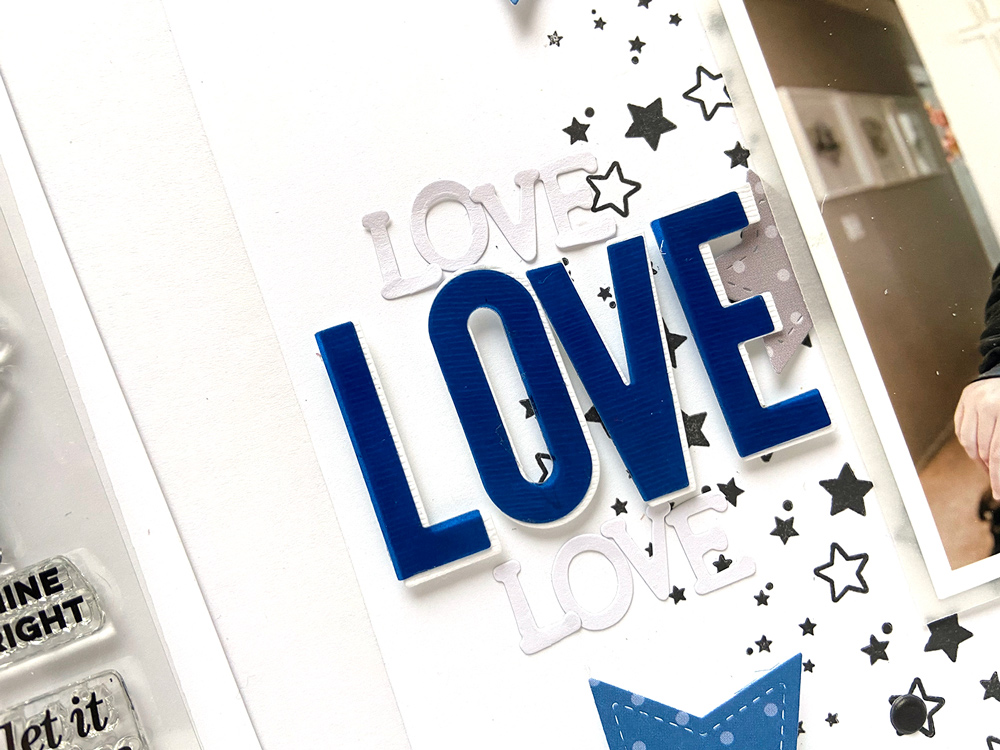
The title came next, and the Navy Acetate Alphabet was perfect! I also used the Large Jane Alphabet Metal Die to cut white letters to back the acetate title. This allowed me to use foam squares without them showing through. Above and below this, I added the same word to emphasize the title using the White Typewriter Cardstock Alphabet Stickers.
To complete the layout, I cut several blue and gray stars using the Jewel Polka Dot Paper Stack and placed them around the photo with a few puffy dot stickers. Last, I typed the journaling using my manual typewriter, cut it into strips, and placed them in the bottom-right corner. I noticed later that the date strip is crooked, but that just gives it character.
I love the limited color scheme on this project, and with the black stamped background, it is quite striking against the photo of my girls.
Thank you so much for stopping by today, and I hope you’ve been inspired to create! Remember when using Elle’s Studio products to use the hashtag #EllesStudio when posting to social media so we are sure to see your amazing work!

Show us what projects you’re using your My Star Stamp and My Star Metal Die on! As Jen said above, you can post to Instagram using the hashtag #EllesStudio, or join our Elle’s Studio Facebook Group and share with us there!