What do you do when your scrapbooking stash is limited? Or maybe you don’t have the budget this month to include all of the add-ons to your cart? Take a cue from design team member Steph Grimes and use what you have in a BIG way! Let’s take a look at the amazing new spread that she is sharing with us today that uses only three products from our March 2020 monthly kit and add-ons!
Happy March everyone! This month’s kit is so awesome and I am really excited to be featuring one of the extras included in this month’s release on my project today. The Go See Do Acetate Die Cuts are my featured product for this spread and I used them in a BIG way!
Supplies | March 2020 Kit, Go See Do Acetate Die Cuts, Black Typewriter Cardstock Alphabet Stickers
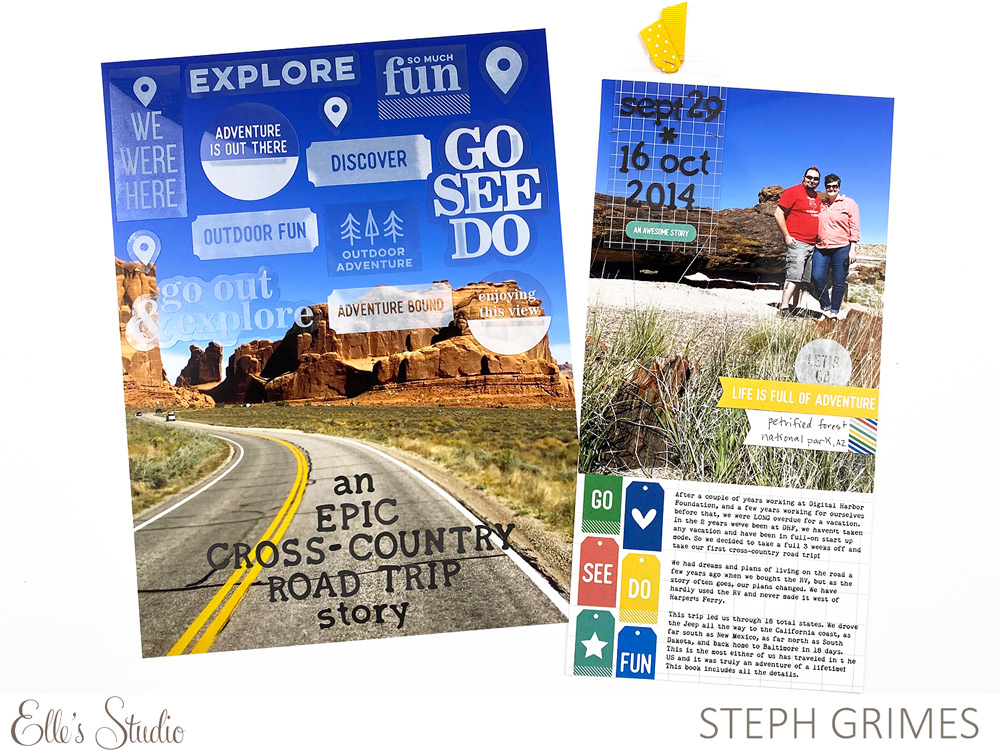
This pair of layouts, one 9” x 12” layout and one 6” x 12” layout, will be part of the opening pages for a travel album I am just starting from a 2014 trip. In September and October of 2014, my husband and I packed up our Jeep, took three weeks off of work, and headed West on the first of many cross-country road trips. We had a short list of places we wanted to visit and tickets to a concert in Colorado, but other than that it was just us and the wide open road and we would figure it out as we went. It was, without a doubt, the most epic adventure either of us had ever been on!
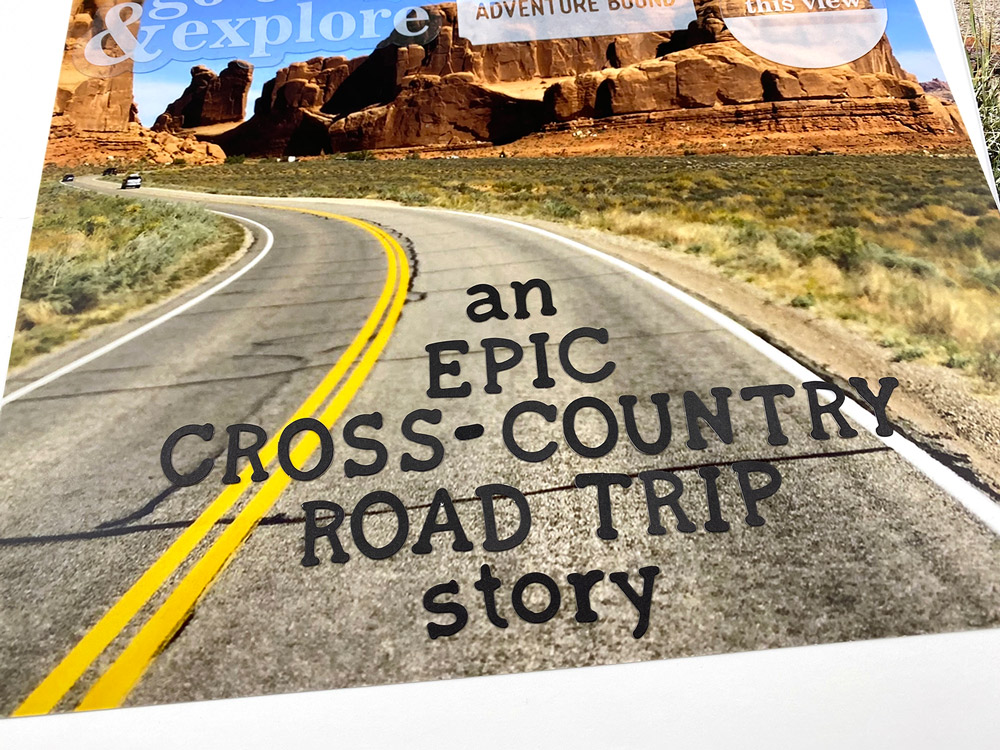
Taking all that into consideration, I felt like these opening pages needed to make a big, epic statement. Using that as my guide, I decided to print one 9” x 12” photo and use that as the base for my title page. Then, I sorted through the Go See Do Acetate Die Cuts and pulled out every piece that was travel related to see if I could add them ALL to my page. You might be able to tell, I was successful! All I have left are the stars, the numbers, and a couple of geotags, which will all be used throughout this album or on another project.

To adhere them to my page with minimal adhesive showing, I used my tiny Xyron Sticker Maker to cover the back in adhesive, then used red line tape for those pieces that were too large to fit in the sticker machine. Once I decided on the acetate shapes as my featured product, I wanted to challenge myself to see if I could achieve a maximum statement on this spread using only a few supplies.
Next, I needed a title. I figured, why not go big with my title too? But, I needed it to use minimal supplies and I wanted some of the photo to show through. The new Black Typewriter Cardstock Alphabet Stickers were perfect for creating my epic, long title because they are a good size and there are lots of letters included on the sheets (both upper and lowercase). If you’re keeping track, I am up to two products used on this project so far!
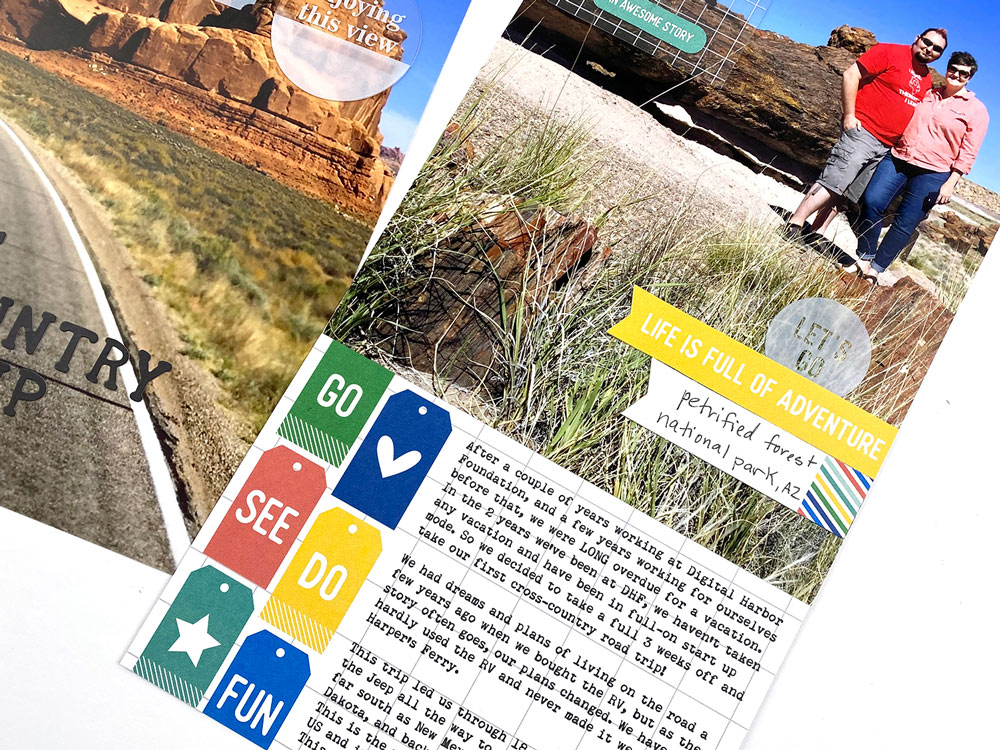
When the first page was finished, I needed to figure out what I was going to do with the accompanying page. Again, I wanted to make as much of a statement as possible, and use minimal supplies, so I went straight into the March 2020 Kit to see what I had left in there. I picked out the 4” x 6” journaling tag with the words “Go, See, Do, Fun” written down the side to include my journaling. I had a lot to say about this epic adventure, so I decided to type my journaling in Photoshop and print right on the journaling tag.
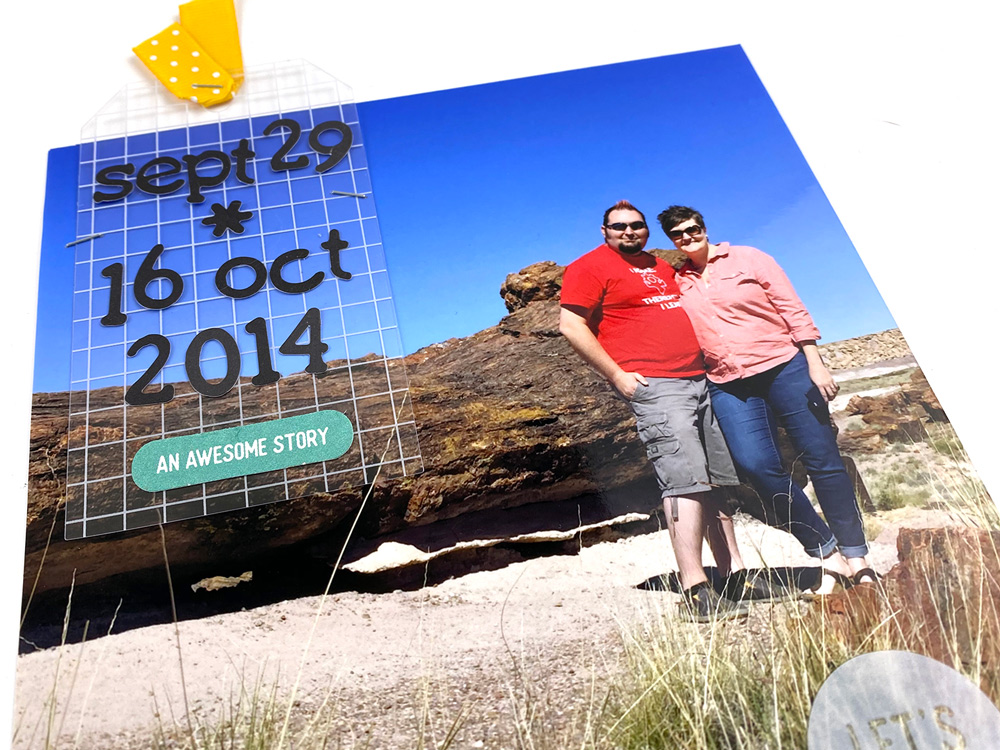
Once I had chosen the journaling tag, I decided on a 6” x 8” photo to pair with it to fill up a 6” x 12” page protector. I cut a piece of cardstock to fit the page protector and adhered my journaling card and photo to it, stacked one on top of the other. I wanted to add the dates of our travel to this second page and had the acetate tag shape left in my unused pile from the Go See Do Acetate Die Cuts, so I grabbed that and added dates using the same Black Typewriter Cardstock Alphabet Stickers. I finished off this tag with a piece of yellow ribbon from my stash and the “An Awesome Story” die cut from the March 2020 Kit.
Finally, I used the colors on the journaling tag to help me pick a few small embellishments from the die cut sheet included in the March 2020 Kit. On the striped banner flag, I added the location of this photo. I had one remaining acetate shape from the Go See Do Acetate Die Cuts that I thought could work on this project and that was the “Let’s Go” circle, so I tucked that in with the flags and banners I added in this embellishment cluster.
My final product count? THREE! I only used three total products on this project and I love how it turned out! I also loved the challenge of creating pages that make a big statement using only a couple of supplies. I think this is a great way to use the products we love, instead of burying them in our stash, and make it easier to make decisions about what to use. Once I decided that I was only going to use the main kit to find my embellishments, I didn’t have to worry about what else I have that might work. This approach worked well for me and is definitely something I’ll be repeating. I invite you to take on this challenge too and see what kinds of maximum statements you can make with minimal supplies! Please share what you make on Instagram and use the hashtag #EllesStudio , or share in our Elle’s Studio Facebook Group!