Our monthly digital printables and cut files are made to coordinate perfectly with each exclusive kit, but today Sabrina Poole is showing us how to start with these versatile downloads when you create! Let’s take a look at all of the different ways she used these files!
Hi everyone. It’s Sabrina with you, and today I will be sharing a fun colorful spring filled travelers notebook spread that I put together of my kids on St. Patrick’s Day. I started this project with the So Awesome Printables included with the March add-ons. I am excited to share with you how I used my Elle’s Studio digitals in a different way!
Supplies | March 2019 Digital Cut File, March Print and Cut Labels, So Awesome Printables, March 2019 Kit, March Labels, Spring Puffy Stickers, Puffy Icon Stickers, Puffy Heart Stickers – Summer Mix, Wood Veneer Confetti, Springtime 6 x 6 Paper Stack, Large Jane Alphabet Stamp – Outline, Large Jane Alphabet Stamp – Stripes, The Details Stamp, Oh Happy Day Stamp, Title Builder Stamp
I started this project in Photoshop Elements with a travelers notebook canvas sized at 8.5″ x 8.5″ and I wanted some borders at the bottom of my spread. I took the green and striped journaling cards from the So Awesome Printables and I placed them at the bottom of the canvas, duplicating the cards several times so that way they would go across the page. Doing this allowed me to create the borders I wanted.
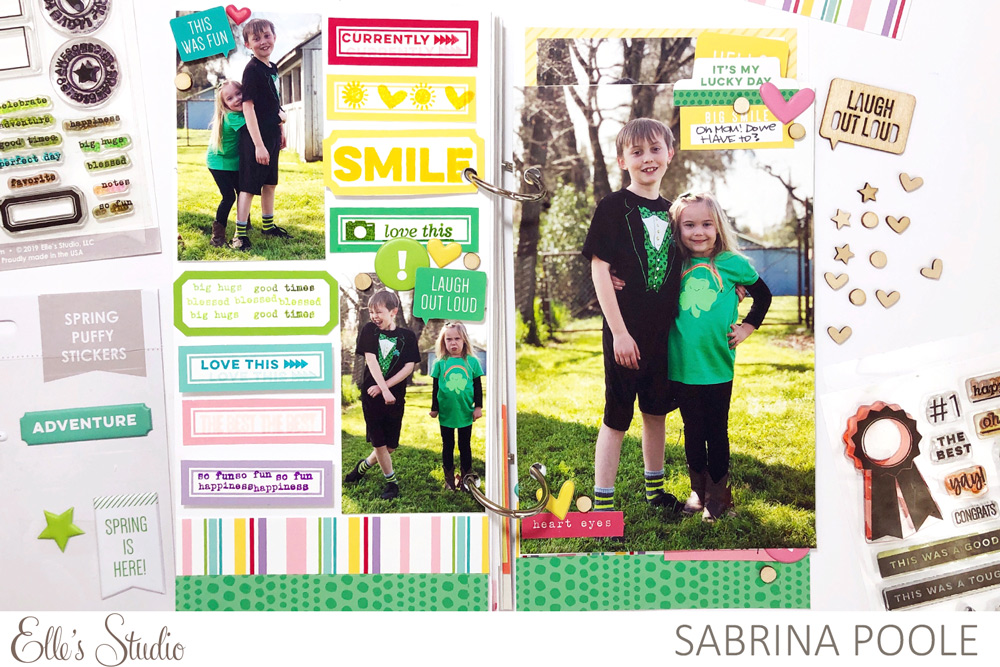
On the left side of the spread, I pulled in all the colors of the rainbow using the March Print and Cut Labels and I placed them so that I could add the smaller photos of my kids, sized at 2.75″ x 3.25″. Putting together this spread digitally allowed me to make sure that the labels and also the photos would all fit on the traveler’s notebook spread!
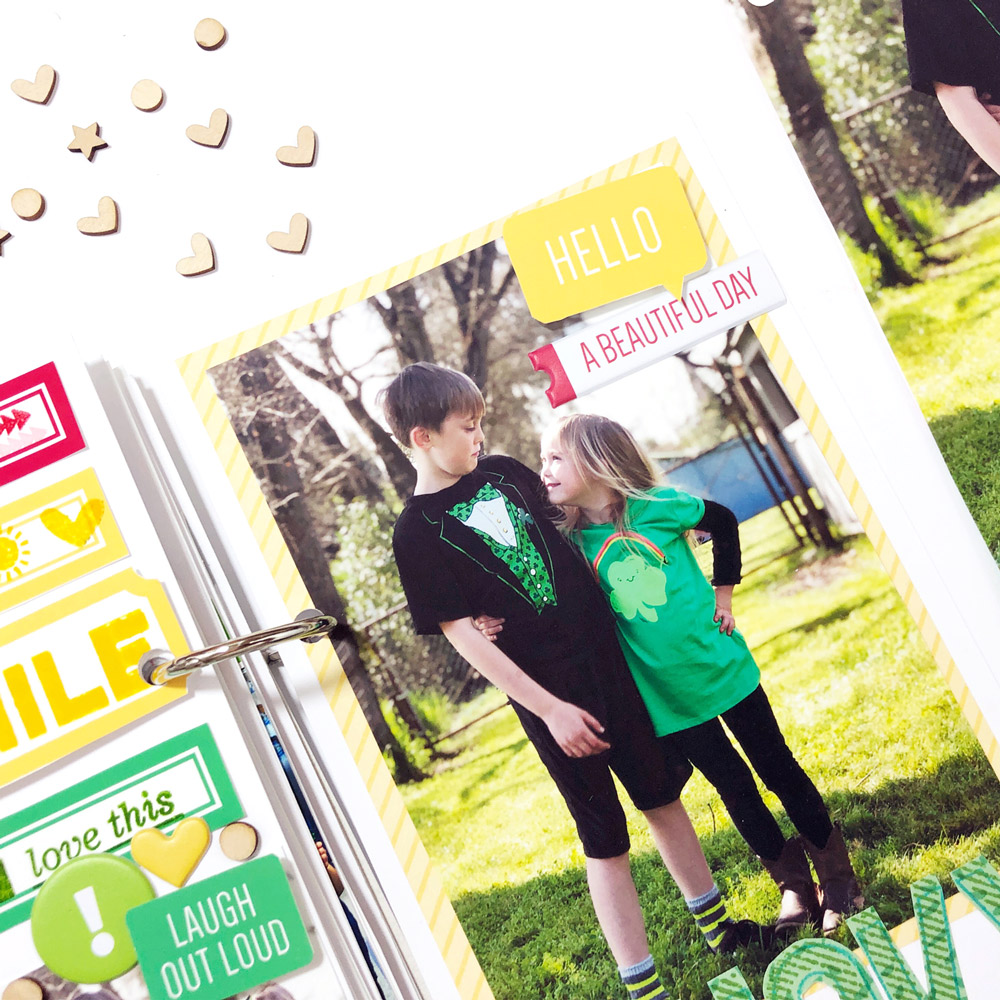
I then took the speech bubbles from the March 2019 Digital Cut File and I used the eyedropper tool to pull colors from the striped card. I used those three colors to make three different speech bubbles for my project. Once I had them re-colored, I dragged them to my spread and placed them where I wanted them. I did have to shrink the speech bubble down 70% so that it would fit on the photo and would not be too big. With the help of the March printables, labels, and cut file, I was able to create my spread digitally. It made for a great foundation and starting point for my spread!
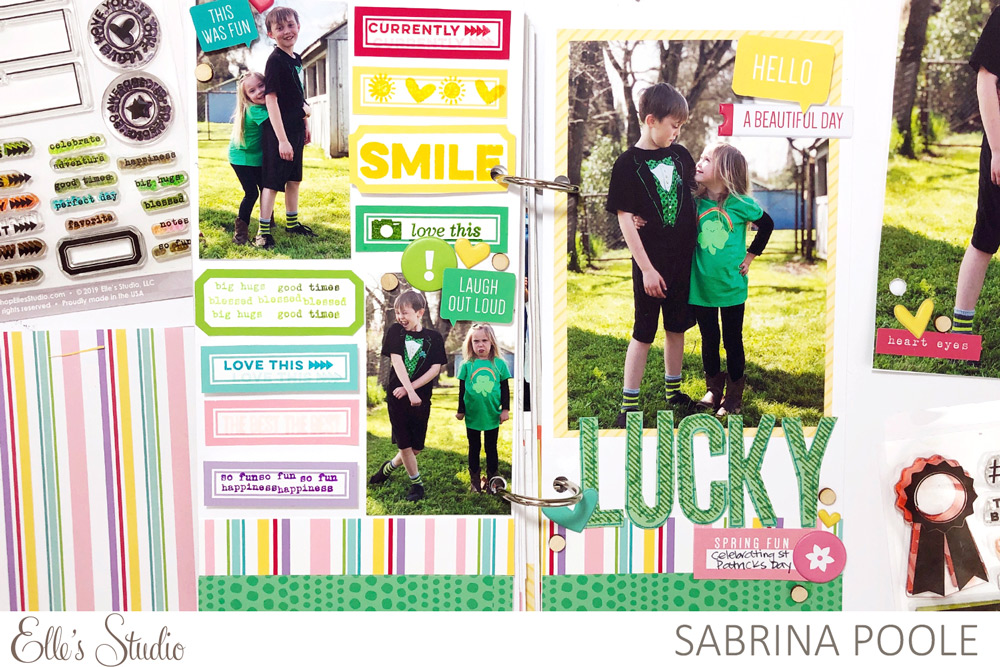
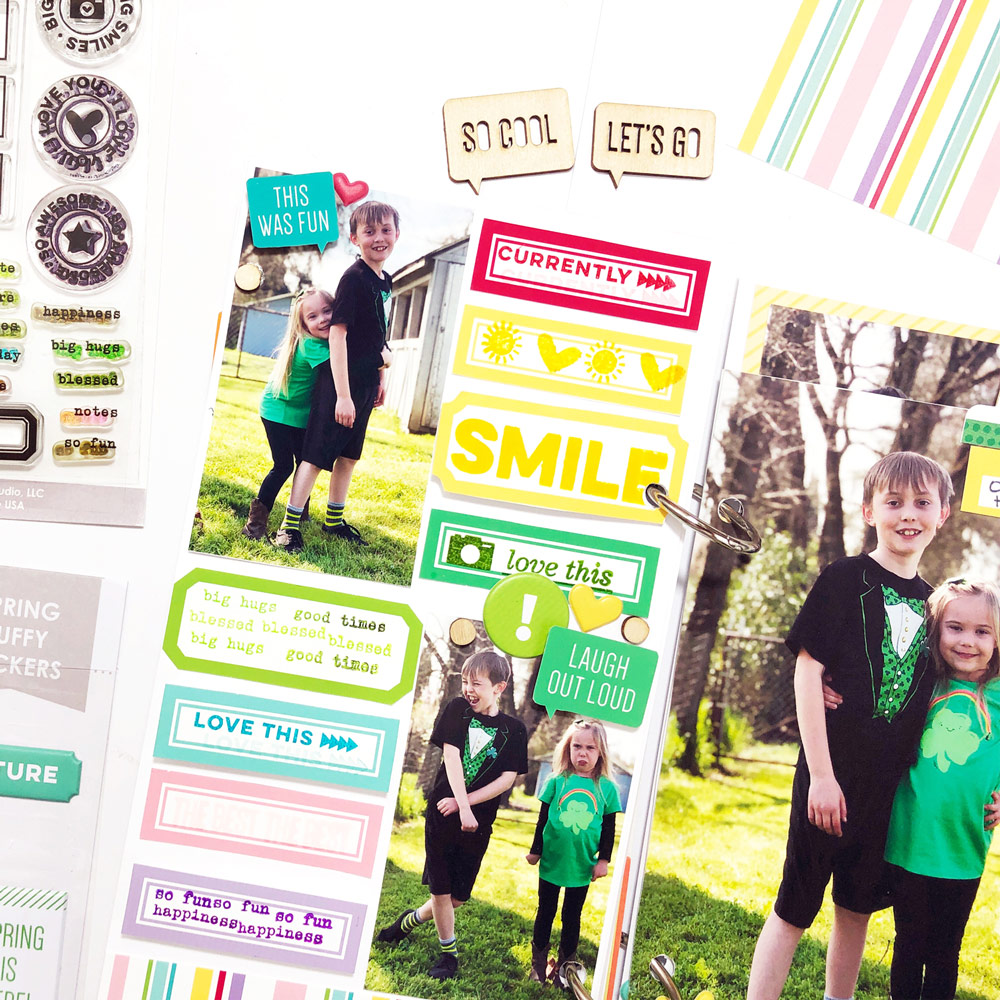
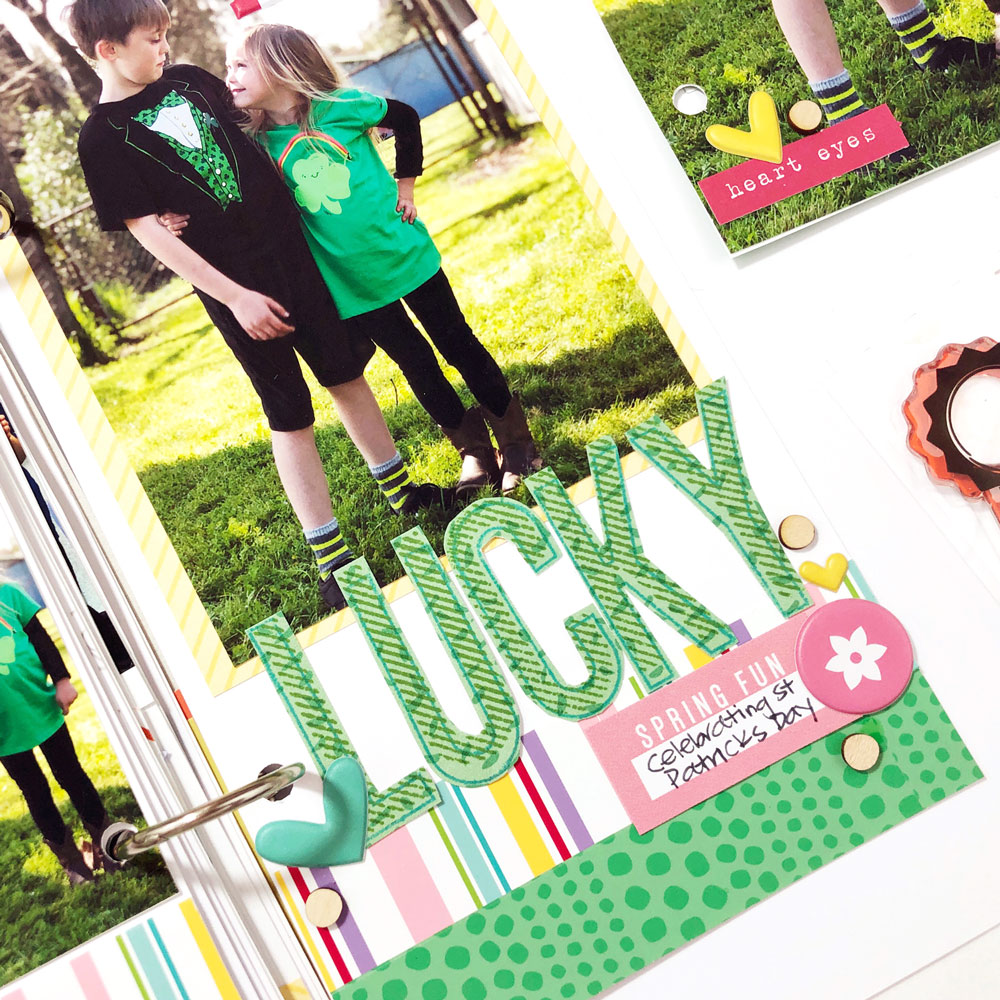
I printed out all of these pieces, fussy cut them and then got started on my physical spread. I began by gluing down my green border and striped border that I made using the digital printables and then I adhered my photos. I then decided that I wanted to stamp on all the labels using the The Details Stamp and Oh Happy Day Stamp to add to the overall theme of rainbows. I had a lot of fun stamping different sentiments on each of the labels like ‘smile’, ‘big hugs’ and little icons. I also stamped out “lucky on the right hand side with the Large Jane Striped and Outline Stamps on a green piece from the Springtime 6 x 6 Paper Stack.
I also added in some Wood Veneer Confetti for extra dimension and texture to my page. Some diecuts and puffy stickers added in another layer of dimension and visual interest. Adding in all these different components helped me to create a fun eye-catching, colorful spread that really captured the adorable photos of my kids.
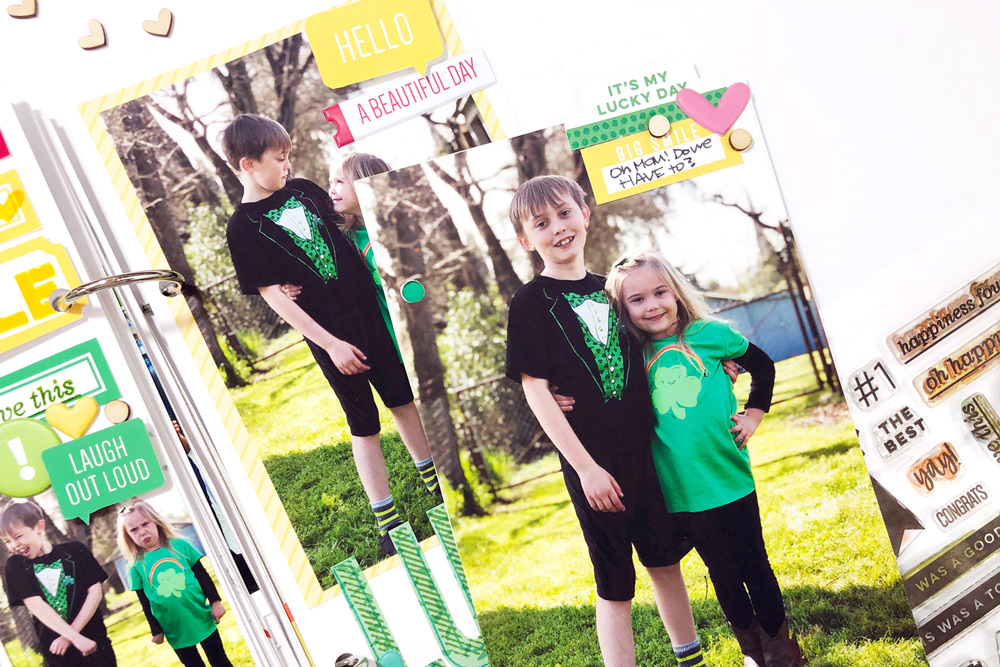
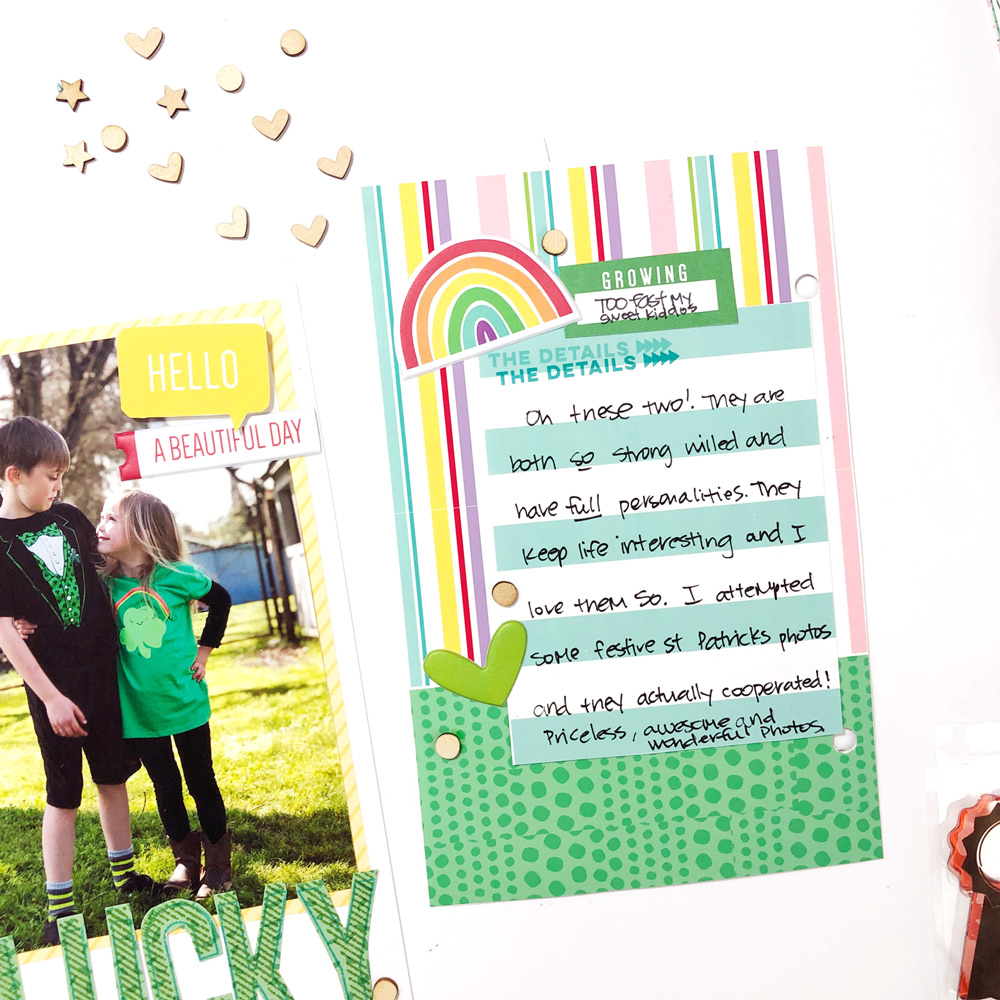
I had one large photo that was my favorite photo of all the photos so I decided to make a fun insert with it. I sized the photo at 4.25″ x 6.5″ to include in the middle of the spread. On the back I adhered the same printables—the green dotted card and striped card—to make a journaling spot. I duplicated the striped card and also the green card so it would cover the entire back of the photo. I also used ‘the details’ journaling tag from the So Awesome Printables and I put all of these pieces together on the back and it made it made an unique journaling place.
I had so much fun figuring out a new way to use the March 2019 Digital Cut File, So Awesome Printables, and March Print and Cut Labels. I hope this helps you to think outside the box when it comes to using the monthly digital printables and cut files. They can be used in lots of ways other than just labels and cards! Have a good week!