We are so excited to welcome our April guest designer, Rachel O’Neal to the Elle’s Studio blog today! Rachel always creates bold, FUN and colorful layouts, and inspires us with her use of digital cut files! Let’s see what she created to share with us today using the April kit and add-ons!
Hello friends! My name is Rachel and I am so excited to be able to share my creations with you this month. I’ve had the Elle’s Studio April kit and many of the other shop goodies on my table for a few weeks now and I’ve enjoyed playing with everything! So let’s jump right in and I’ll tell you all about my first project!
Supplies | April 2019 Kit, Bright Die Cut Labels, Heart and Star Acetate Die Cuts, Hazel Alphabet Stickers – White, Shapes and Dots Puffy Stickers, Love This Wood Veneer, Springtime 6 x 6 Paper Stack, Wander Stamp, Mini Dated Stamp
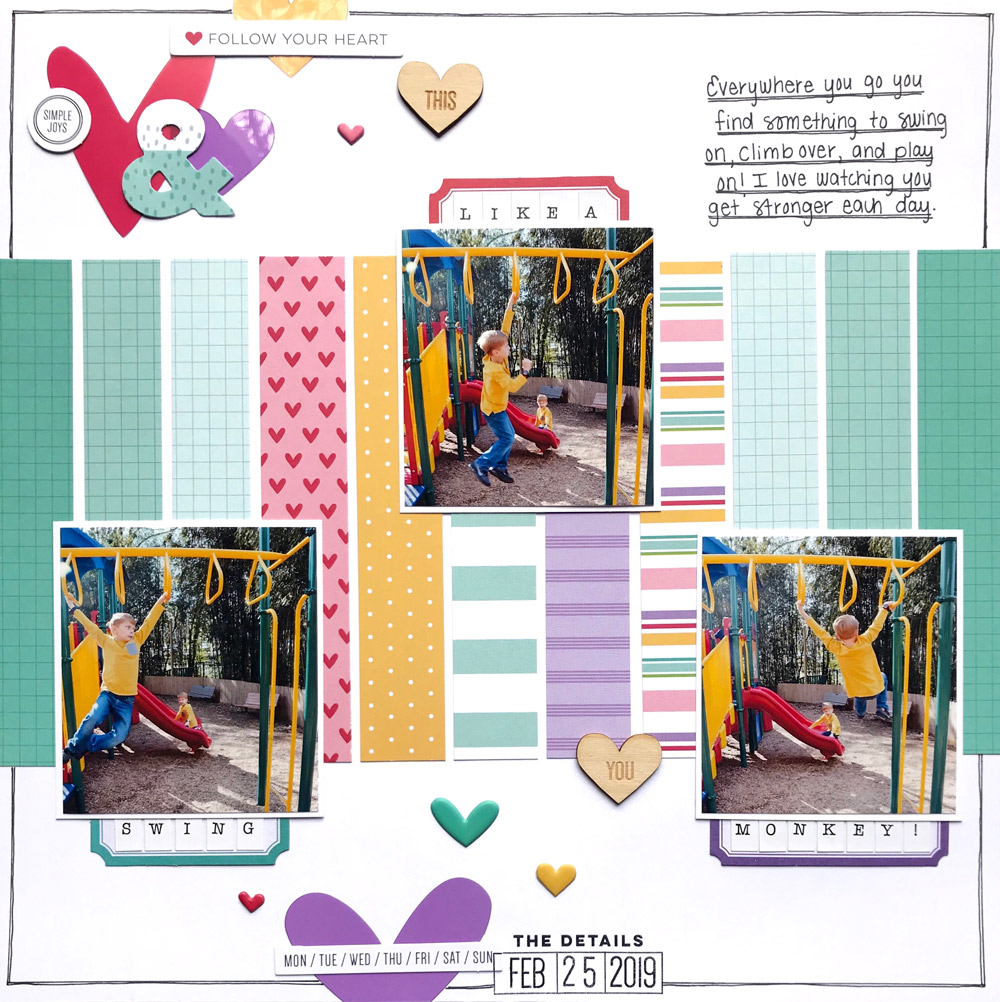
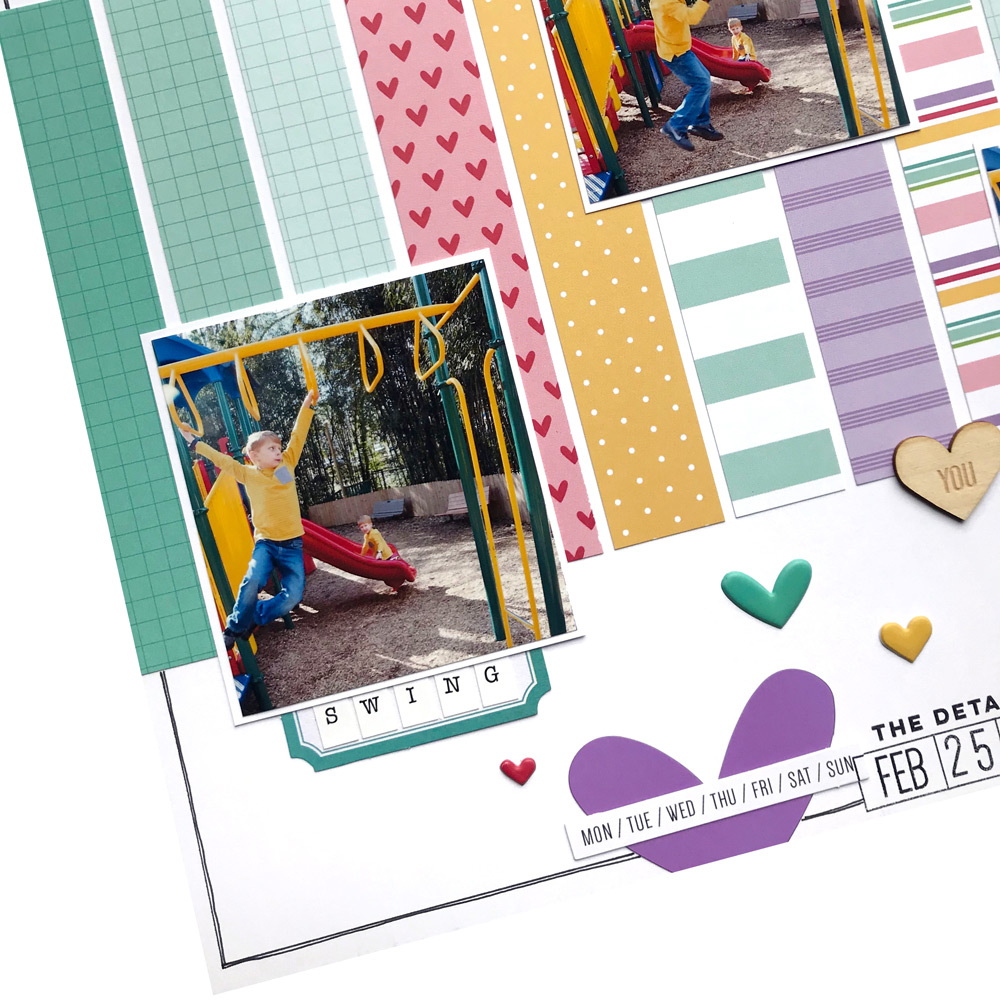
I was immediately inspired by the Springtime 6 x 6 Paper Stack. It’s filled with 12 beautiful designs that coordinate perfectly with this month’s kit. I took six of the designs and cut several 1 inch strips from them. I used eleven of the strips and placed them across the middle of a piece of white 12 x 12 inch cardstock. Tip: When I’m doing something like this that requires even spacing, I always lay them out on the paper first and play around with them before adhering them down to the paper.
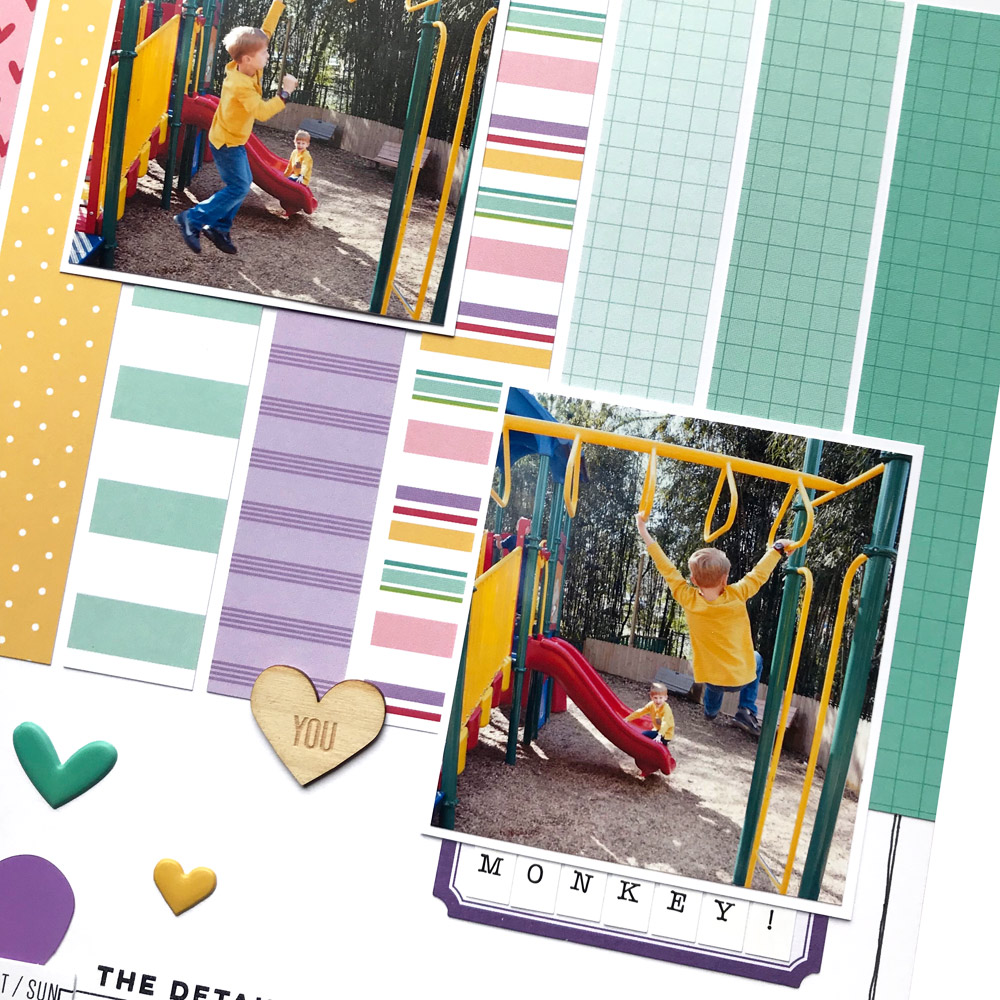
Next I chose my three photos, matted them with white cardstock, and added them to my layout in a zig-zag pattern. Above or below each photo, I slipped in a label and used the white Hazel Alphabet Stickers to create my title.
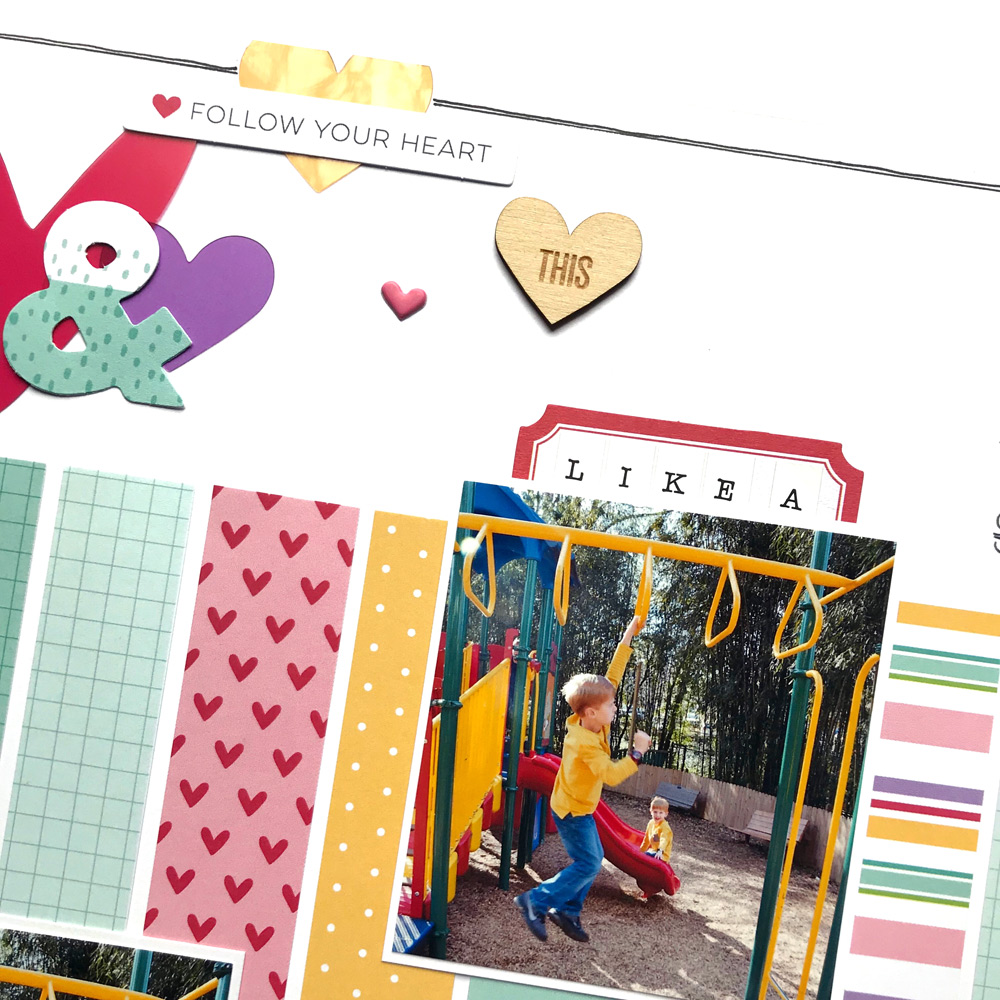
Now it was time to embellish and in my opinion the more the merrier, right!? I used a variety of hearts: acetate, puffy stickers, and wood veneer. I also used several die cut pieces from the April 2019 Kit. I love the ampersand, the days of the week, “simple joys” and the “follow your heart” phrases. All of those fit so well with this layout and describe how I feel about my boy.
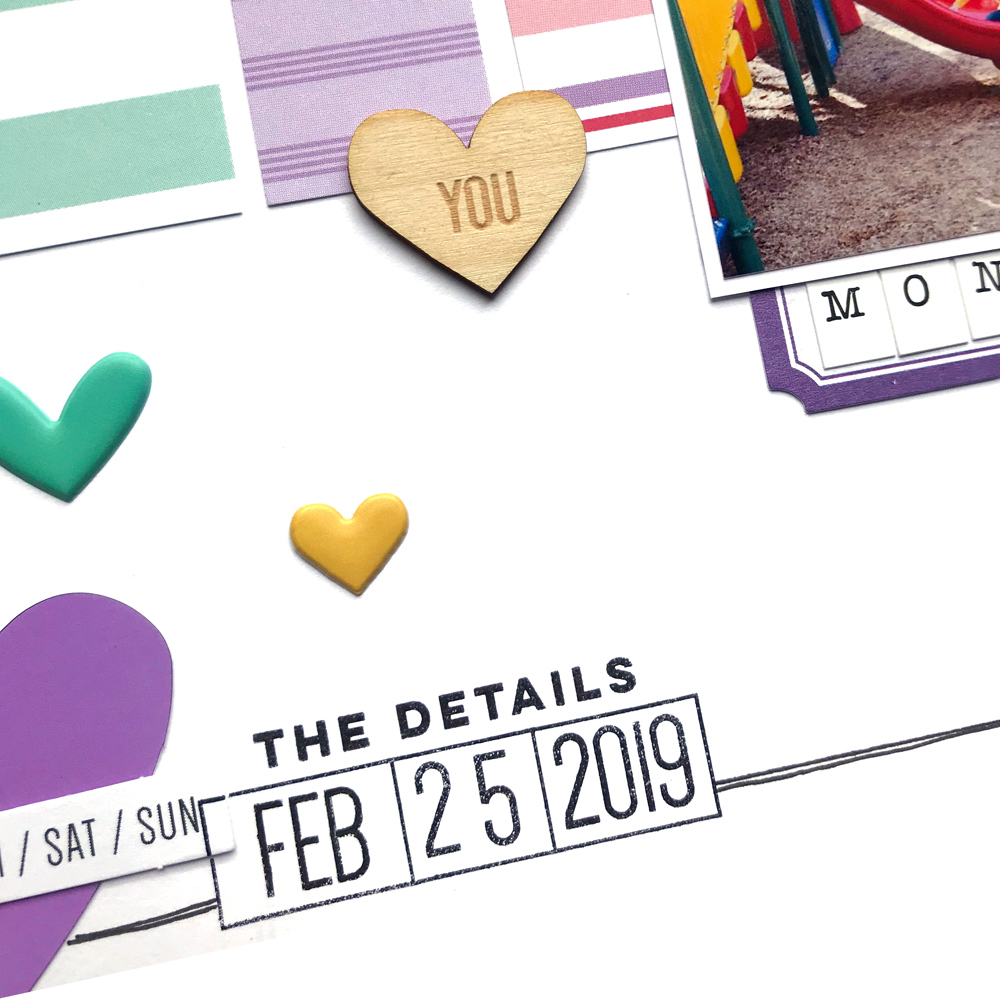
In almost all of my layouts I love to journal. That could be with journal strips I’ve typed on my type writer or in my own hand, writing right on the layout itself. For me, scrapbooking is more than pretty paper and photos. I want to get our story down! For this layout I journaled in the top corner. Tip: You can use a ruler to help draw straight lines for journaling. I typical draw my lines with a ruler and then I go back and free hand a second line next to the ruler line. Don’t forget the date–that’s important too! I used the Wander and Mini Dated Stamp sets to add mine.
The last step in my layout was drawing a border around the edge of my layout. I used the same process as I do when journaling–draw my first line with a ruler and then free hand my second line.
Thank you so much for stopping by today to check out my layout. I hope I’ve inspired you to create something new with your Elle’s Studio stash!

Hi friends! My name is Rachel O’Neal. I’m a wife and mom to the cutest two little boys on the planet. I spend my days homeschooling them and enjoy every minute of it. When we aren’t in school, I love being outdoors – camping, hiking, and taking pictures of our adventures. I’ve been scrapbooking for over 15 years! I love to scrap with cut files, stamps, and bright colors.
Be sure to follow Rachel’s Instagram account for loads of colorful layout inspiration until she shares a new project with us right here next week!
Pingback: A Waterfall of Tags Traveler's Notebook Spread with Guest Rachel O'Neal | Elle's Studio Blog