When using a sketch, don’t feel constrained by the dimensions or the size—use it to inspire any kind of project you want to create! Today, design team member Jamie Leija used our September layout sketch to inspire her traveler’s notebook spread. Let’s see how she changed the design to fit her project!
Hiya! It’s Jamie and I’m so excited to share my take on this month’s sketch:
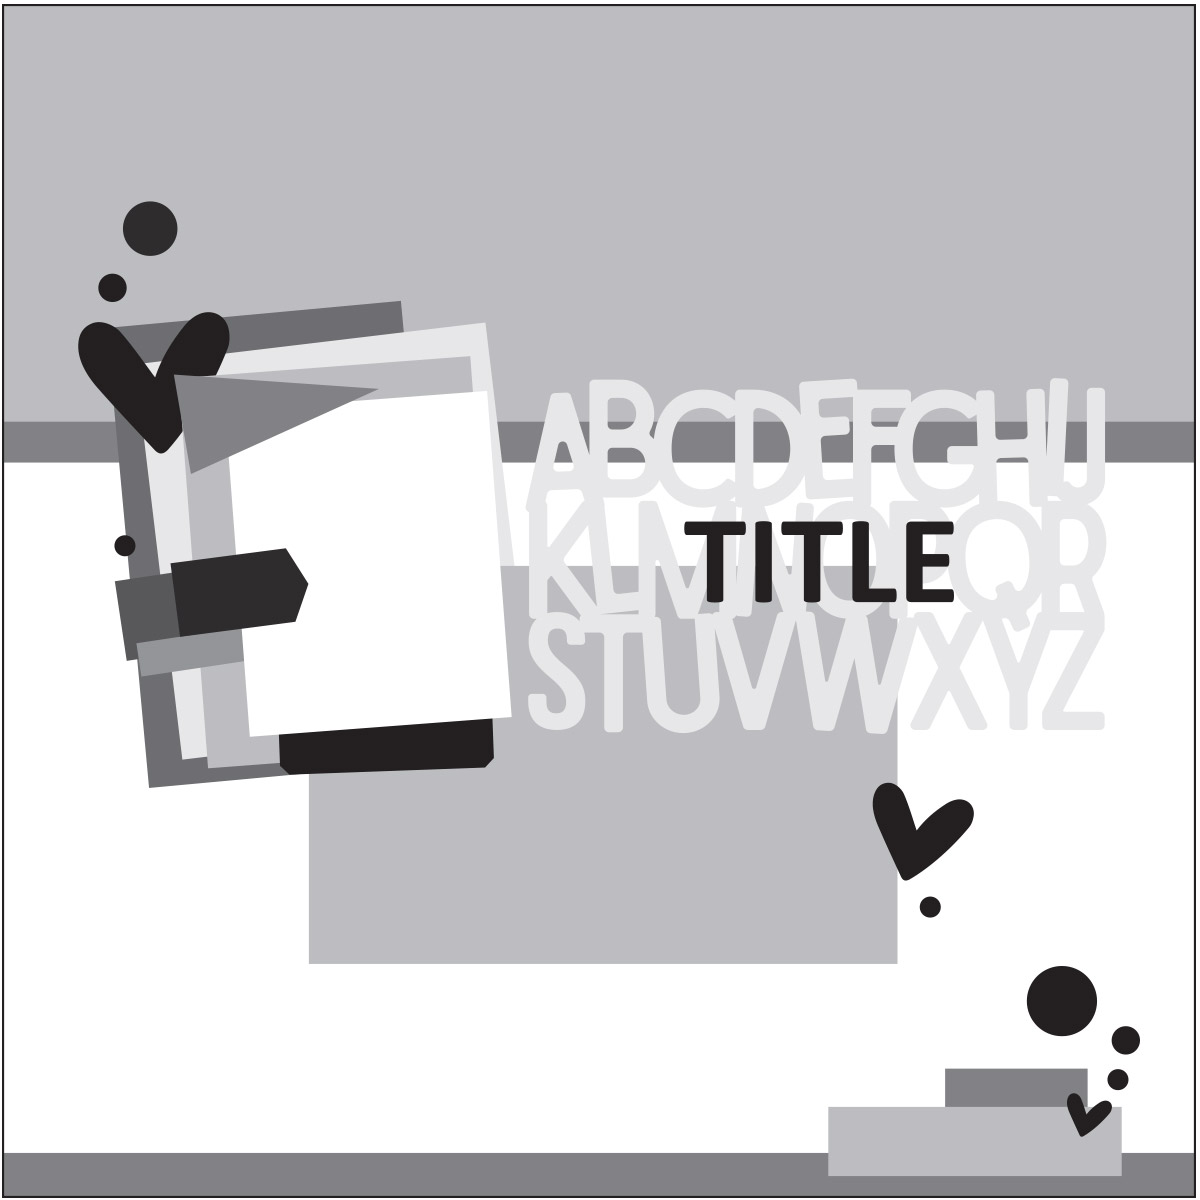
The sketch is based off of the amazing “First Day” layout created by Amanda-jayne! I love the layering she added to her page and wanted to do the same for mine.
Supplies | Celebrate Journaling Tags, March Labels, July Blank Label Stickers, Hazel Alphabet Stickers — White, Celebrate Stamp,Title Builder Vol. 2 Stamp, Mini Dated Stamp, Noteworthy Bits & Pieces, Noteworthy 6″ x 6″ Paper Stack
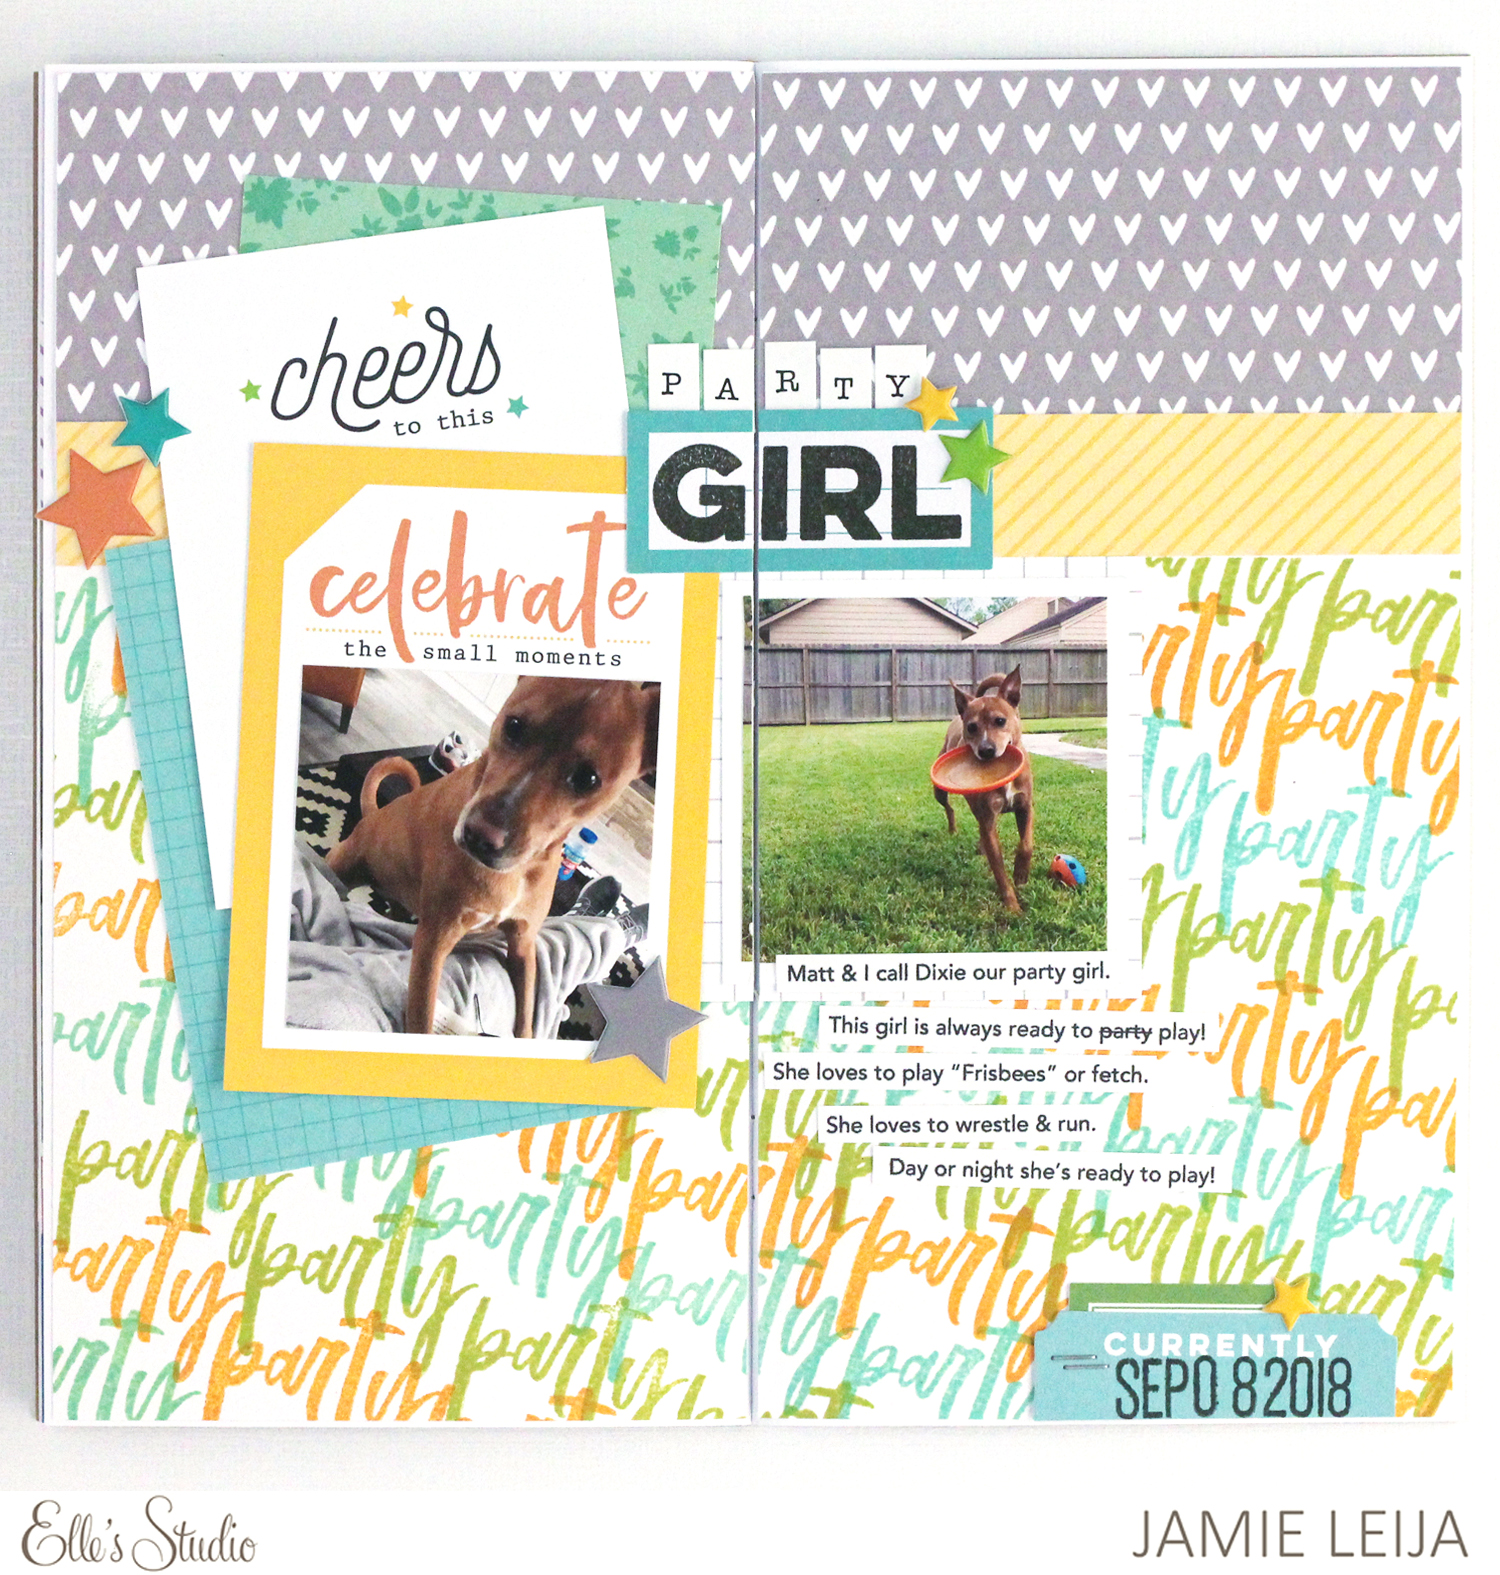
I instantly knew that I wanted to adapt the sketch, which is based off of a 12″ x 12″ layout, down into a two page traveler’s notebook spread. It’s roughly 8″ x 8-1/2″.
Like the sketch, I divided my page into thirds. For the top third, I added a gray patterned paper from the Noteworthy 6″ x 6″ Paper Stack of repeating white hearts. And for the bottom two-thirds, I decided to make my own pattern using several colors of ink and the Celebrate Stamp. It’s what inspired this entire page!
We call our dog a party girl. She loves to play and is ready to at a moment’s notice. It’s something we’ve called her since she was small and I knew I wanted to tell this story when I saw that the Celebrate Stamp included the word “party”.
Where Amanda-jayne used a wood veneer that was text based, I stamped the word “party” over and over again on white cardstock using orange, teal and green ink. It has the same effect, but it is flat and therefore much easier as a notebook spread.
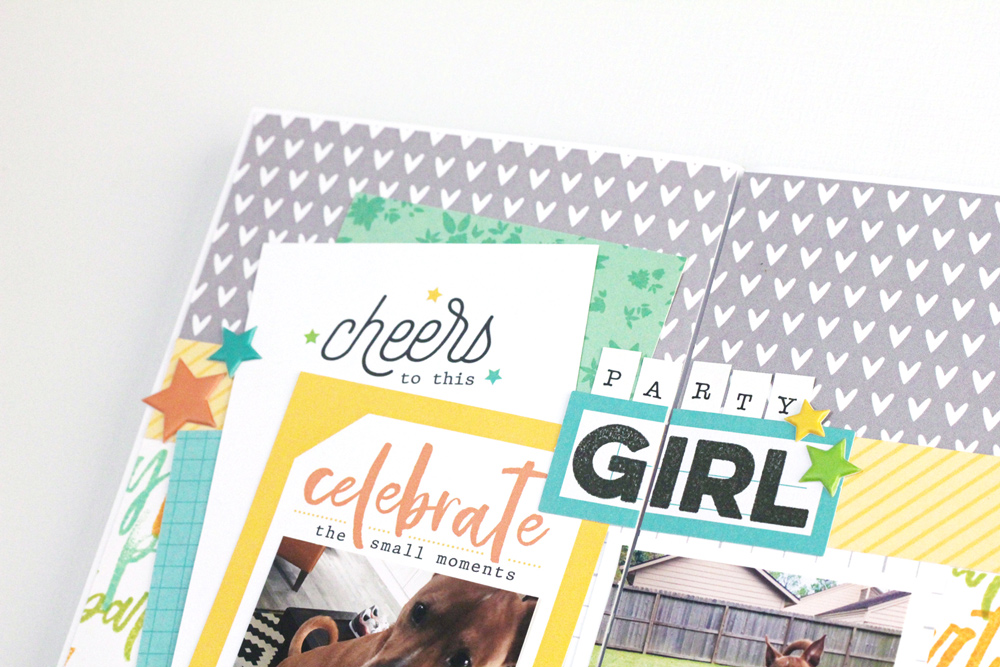
I added a cluster of patterned paper from the Noteworthy 6″ x 6″ Paper Stack and Celebrate Journaling Tags behind my photo, similar to the sketch. I love the layered look and that I was able to represent the colors of the ink again in my patterned paper choices.
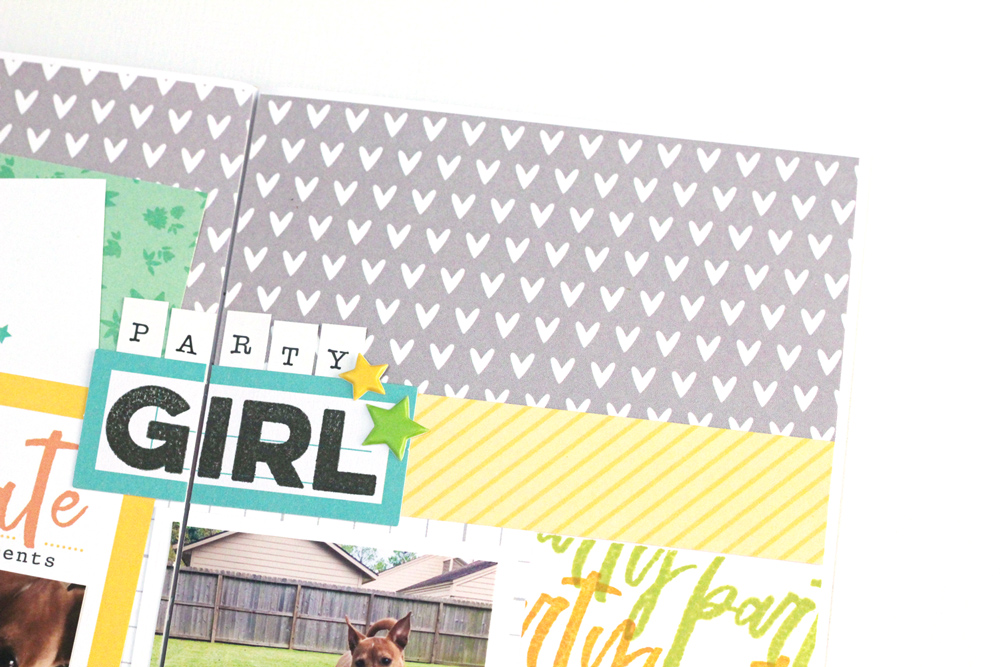
The title, which I created by stamping “girl” from the Title Builder Vol. 2 Stamp onto a July Blank Label Sticker and adding the word “party” with the Hazel Alphabet Stickers, was shifted up and to the left and that left me room to add an additional photo. I was also able to add typed journaling strips below.
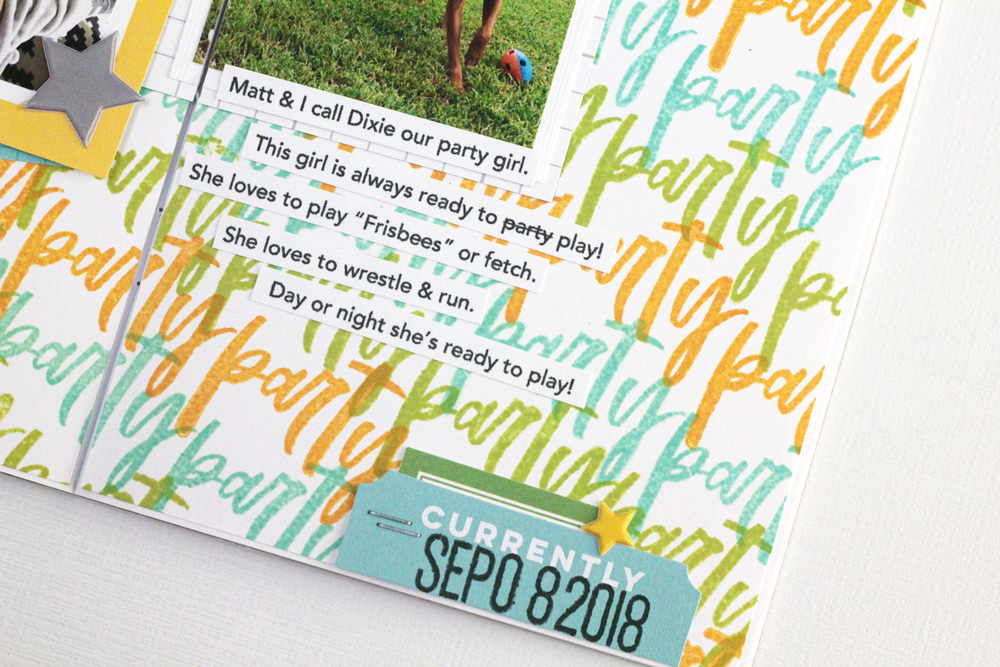
I eliminated the bottom strip from the layout, but did feel that I needed something in the bottom right corner. A die cut from the Noteworthy Bits & Pieces, label, and puffy star, along with some staples and my Mini Dated stamped title was just what the corner needed.
The beauty of the sketch is that you can make it your own! My notebook spread has the same vibe of the sketch, but the elements are slightly shifted around to accommodate the smaller size. The main photo has a cluster of layers behind it and the page was divided up into thirds. There’s a string of embellishments stretching from the left to the bottom right. There’s layers and graphic text. We can’t wait to see how you use this sketch for your next project!

We can’t wait to see how you use this sketch! Show us what you’ve created using this sketch by posting your layout on Instagram using the hashtag #EllesStudio! You could win a feature here on our blog, as well as a gift certificate to our shop!
September Sketch Day with Jamie Leija
Comments