Whether you create pocket pages for a weekly, monthly or just an event format, our monthly kits can help you get those stories told—no matter what they look like! Design team member Jess Forster has recently switched up her pocket page process, and we love how she uses our kits to get her beautiful photos and poignant journaling into her pockets. Let’s take a look at her latest creation:
Supplies | April 2018 Kit, Everyday Goodness Stickers, Banner Stickers, Adventure Puffy Stickers, Monthly Puffy Stickers, Acrylic Stars
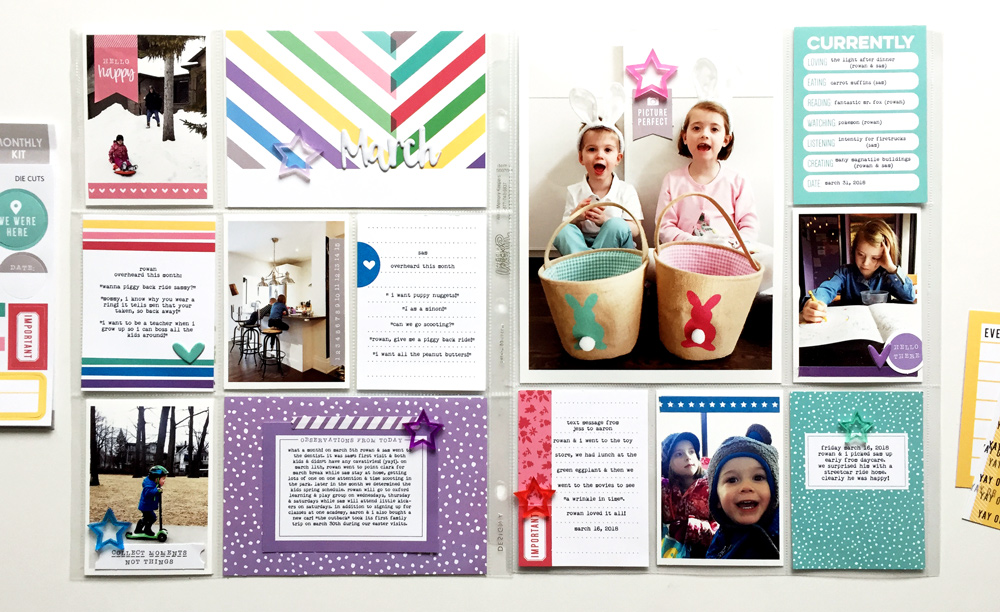
This year, I am excited to use Elle’s monthly kits to record our monthly family stories. Simply put, instead of taking a weekly approach, making 52 layouts per year; I am creating 12 pages, or one spread per month! Here is a video overview of how I created my March 2018 pocket page layout using the April 2018 Kit. Have a look at how the page came together in this video:
For me, the first thing to do is to review my previous monthly layout. Pocket page scrapbooking is like a puzzle. You have look at the previous layout to see how the pieces (photos and journaling tags) will fit together moving forward. The first step in my creative process is to create a sketch.
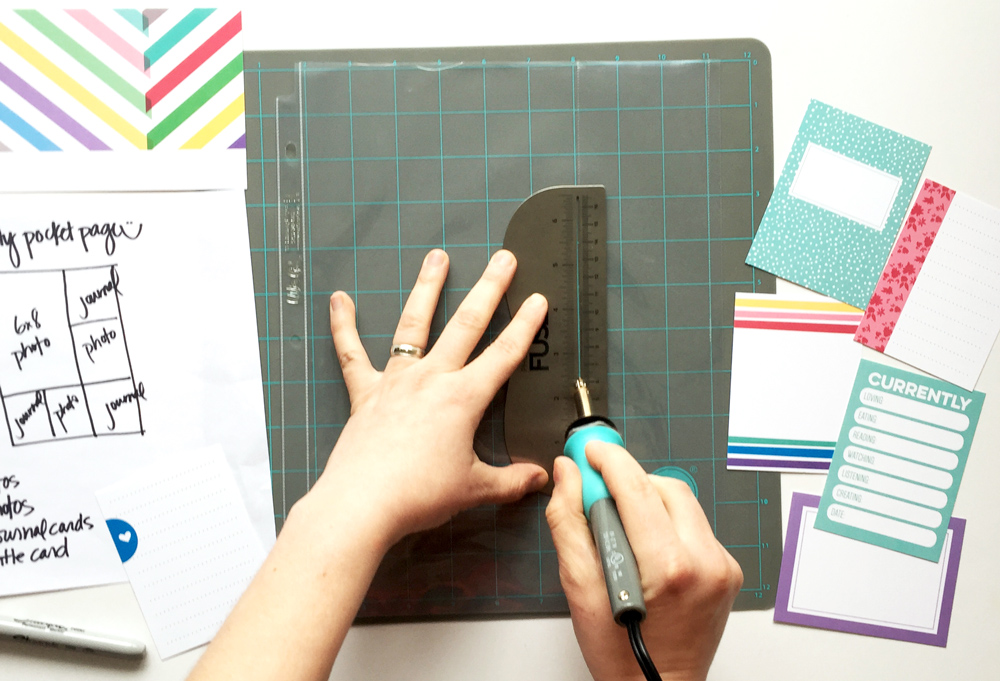
This year, I am using two, 9″ x 12″ pocket pages per month. Using my stash of divided page protectors and my photo trimmer, I just cut them down to the size I want, making sure that I don’t cut the seams. Since I know I want to include a cute enlarged photo of my kids from Easter, I decide to create my own custom pocket page, using the Fuse Tool, a silicone mat and regular 12″ x 12″ page protector. Since I will be using the backside of the custom page protector, I should note that I don’t completely close it up. That will finish seaming it together next month, when I fill the flip side, for my April layout.
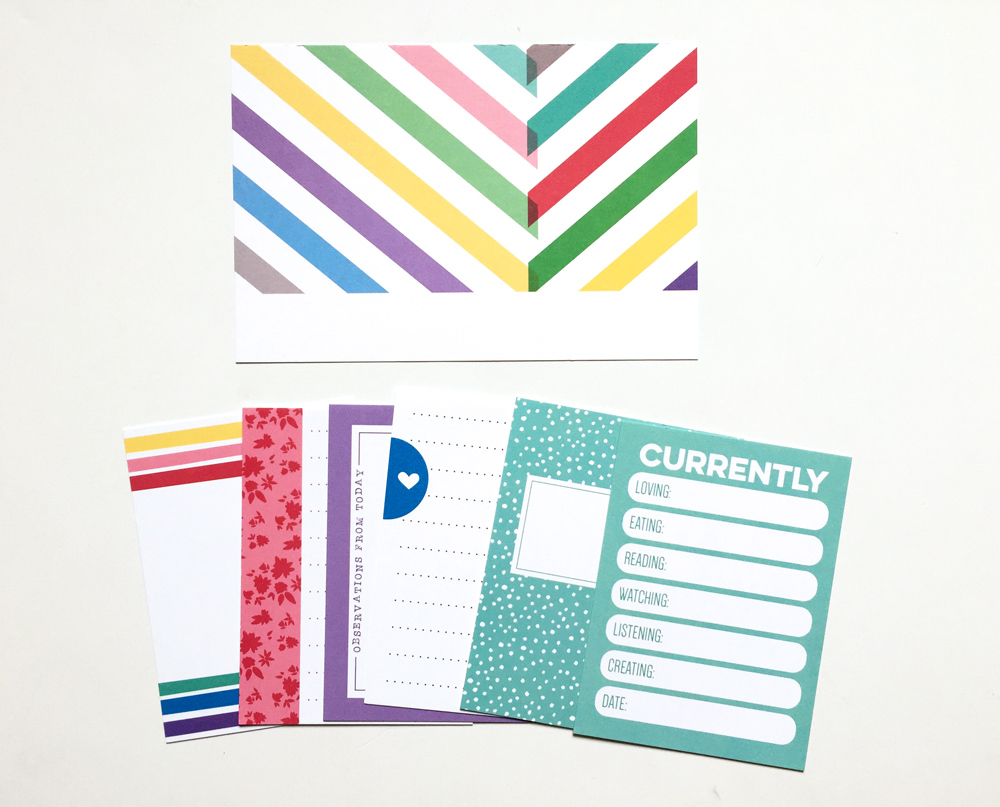
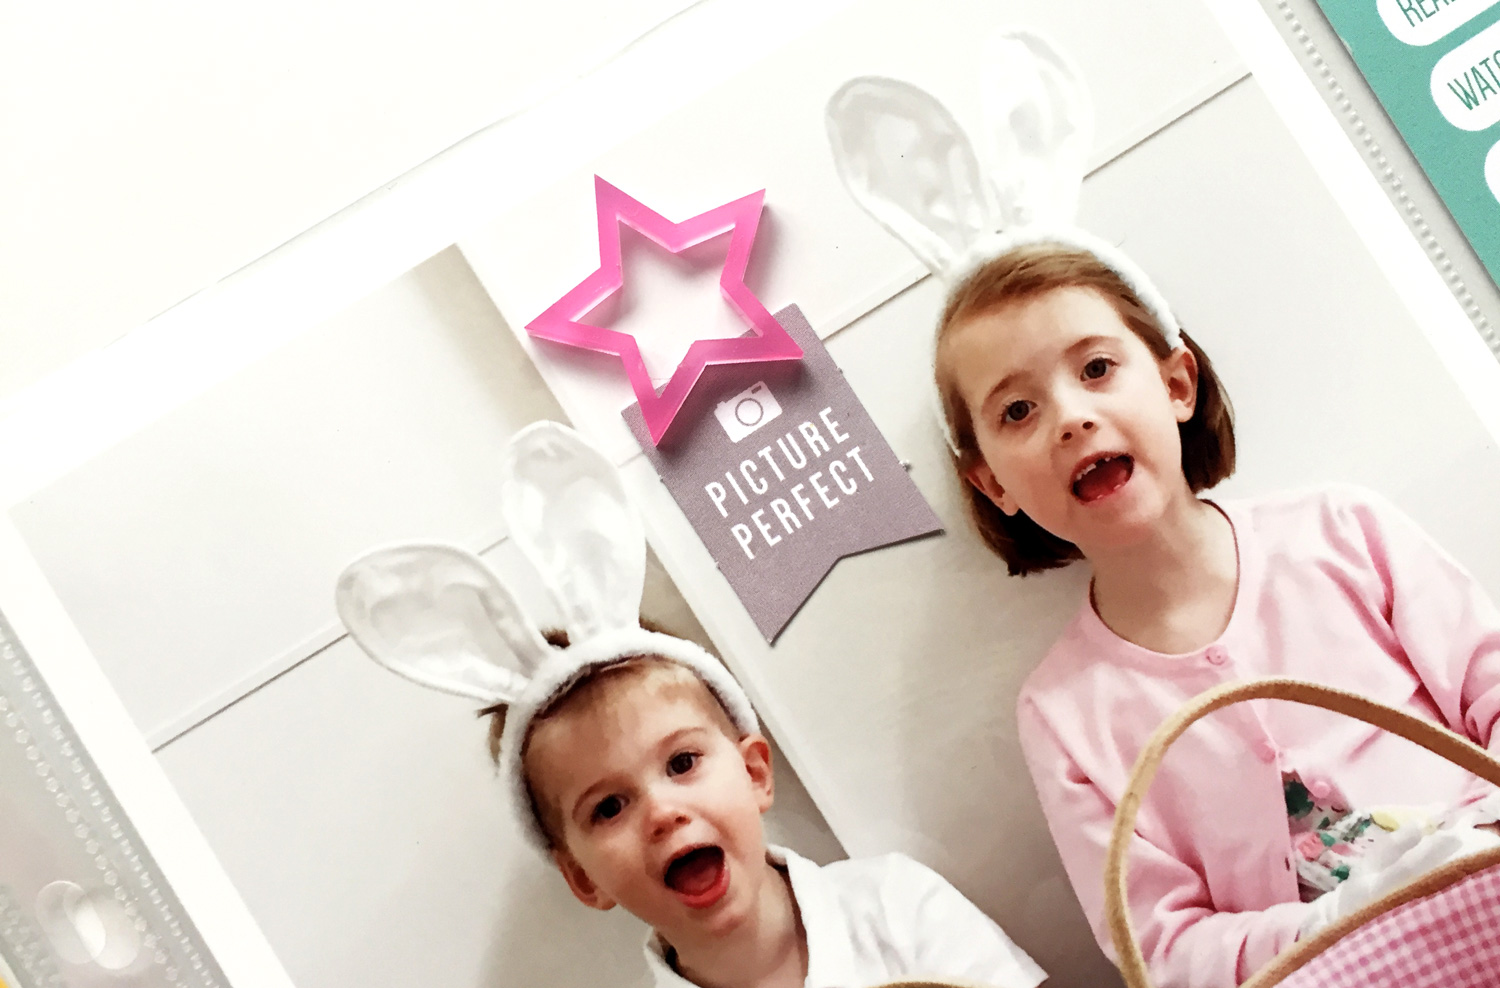
Once my page protectors have the spaces I want, I print out my photos and choose my journaling tags from the April Kit. This month, I included both individual and group pictures of my kids. No surprise: my kids are the focus of each monthly page. In terms of the journaling tags, I always sort Elle’s monthly kit by colour. Not only do I use most of the tags from the kit each month, I love the consistency of colour she uses in her tags…so awesome!
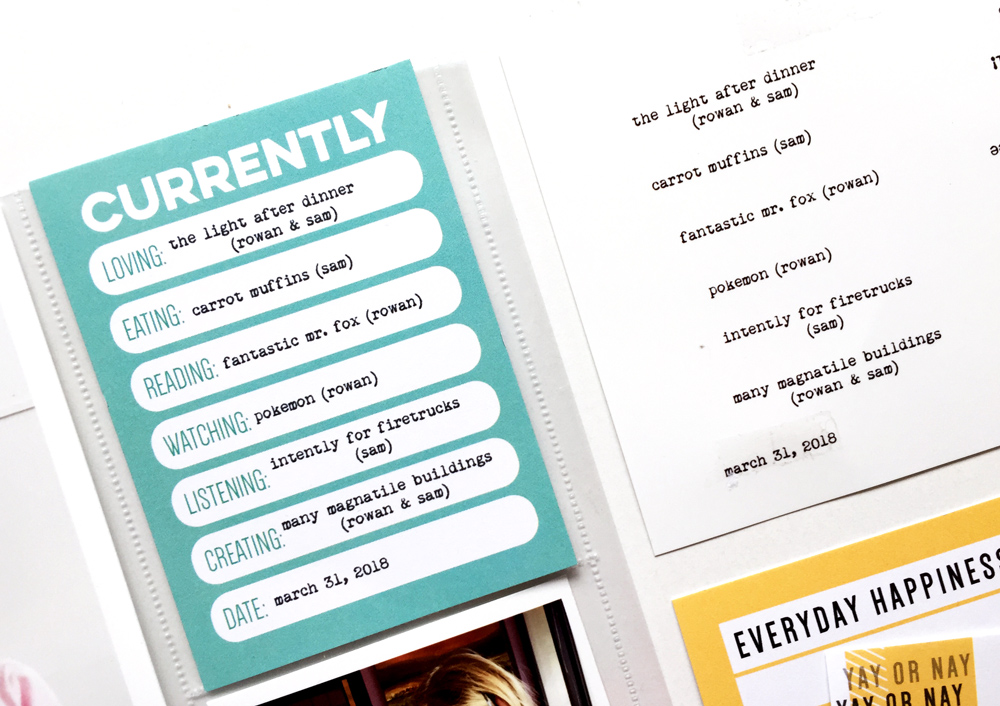
Once I have decided on the placement of photos and journaling tags, I type my journaling on the computer. I take a photo of the tag I want to add journaling to and then open the photo up in Photoshop Elements. I type my journaling onto the photo to make sure it’s within the lines. When it’s time to print, I turn off the background layer in Photoshop Elements and print the journaling onto a test piece of white cardstock. I then take my actual journaling tag and hold it on top of the white cardstock against a well-lit window, to make sure it lines up. I then adhere my journaling card to my test cardstock and print the journaling again. Fun fact: I learned the “window trick” from Elle’s awesome blog coordinator, Meghann Andrew, and you can see that process in her quick adhesive tips video. Thanks Meghann!
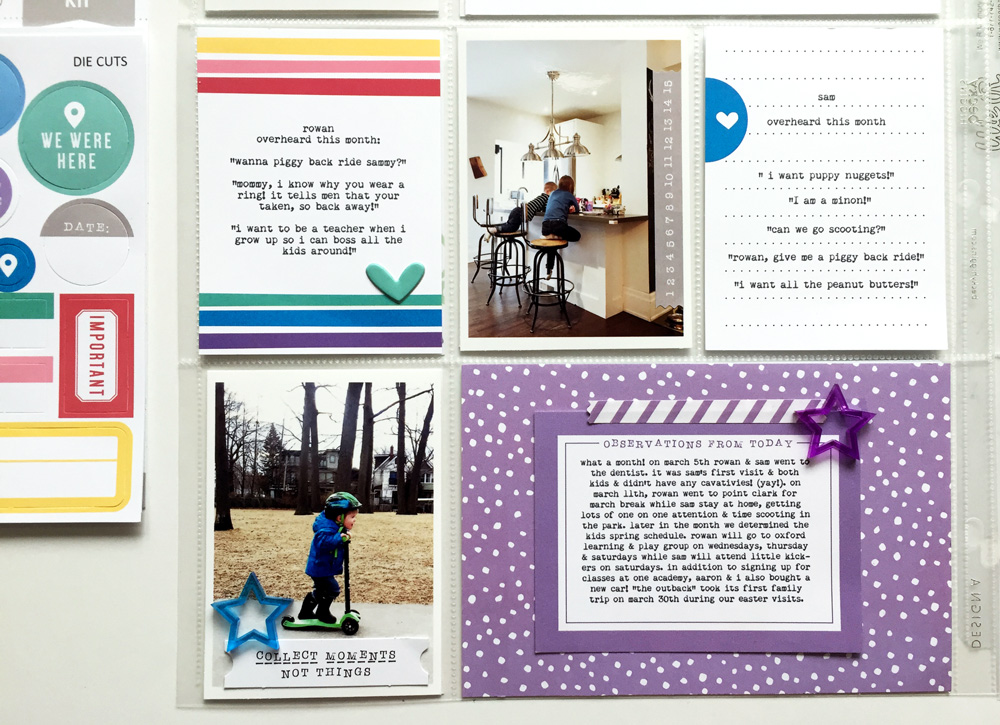
Once the journaling is finalized, I finish off the page with embellishments. This month, I used Elle’s awesome Acrylic Stars, as well as the Everyday Goodness, Banner Stickers and Adventure Puffy Stickers, as well as a few of the die-cuts from the April Kit.
I hope I have inspired you to document your life right now using a monthly approach, or to use the Fuse Tool or to type your journaling on the computer!
Thanks for looking!

What format do you use in your pocket pages? We’d love to see how you’re using our monthly kits, no matter if they’re weekly or monthly pages! Share your creations on Instagram using the hashtag #EllesStudio, for a chance to be featured here on the blog and win a gift certificate to the shop!
A Monthly Pocket Page + Process Video with Jess Forster
Pingback: Documenting Summer Sports with Jess Forster | Elle's Studio Blog