The monthly printables that release with every new kit are perfect for coordinating with your physical product as they are on the printable page, but they can also be modified to create exceptional elements on your pages, just like Neela Nalam did today with her custom page background. She’s broken the process down in a few easy steps below!
For this project, I decided to use a journaling tag from the March 2017 Treasure Printables. I selected the spring flowers tag because I loved the flowers on this one. This inspired me to tell a story about our trip to a botanical garden in Hawaii. I always struggle to make layouts without photos of people, but this tag inspired me to print out a bunch of the photos of the flowers that I ended taking during our trip.
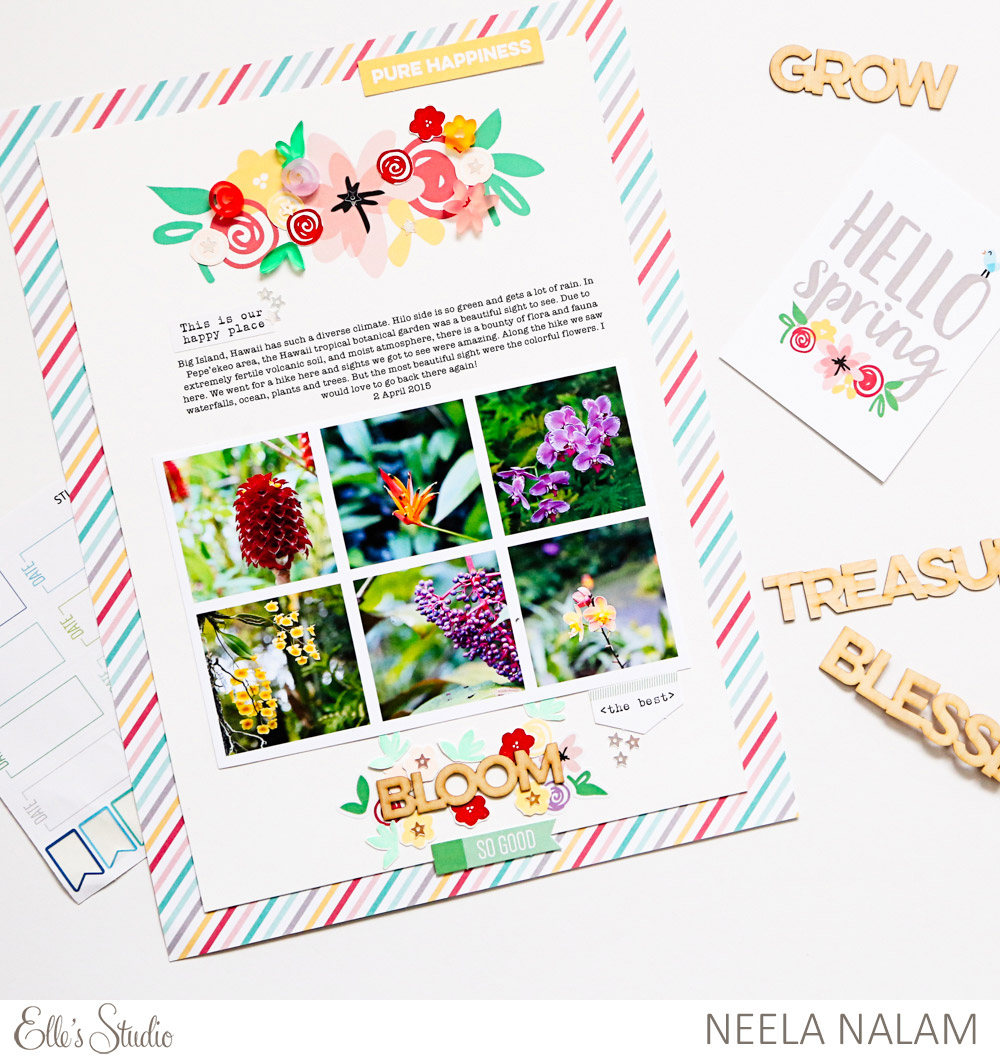
Supplies | March 2017 Kit, File Under Stamp, Sequins- Blue Green Mix, Spring and Flowers Acrylic, Grow and Bloom Wood Veneer, Easter Stickers, Today Sticker Labels, Treasure Printables, Little Moments 12″ x 12″ Paper Collection
To create this layout, I converted the 3″ x 4″ tag to a 8- 1/2″ x 11″ page and added my journaling. The process was simple:
First, I opened the tag in Photoshop Elements.
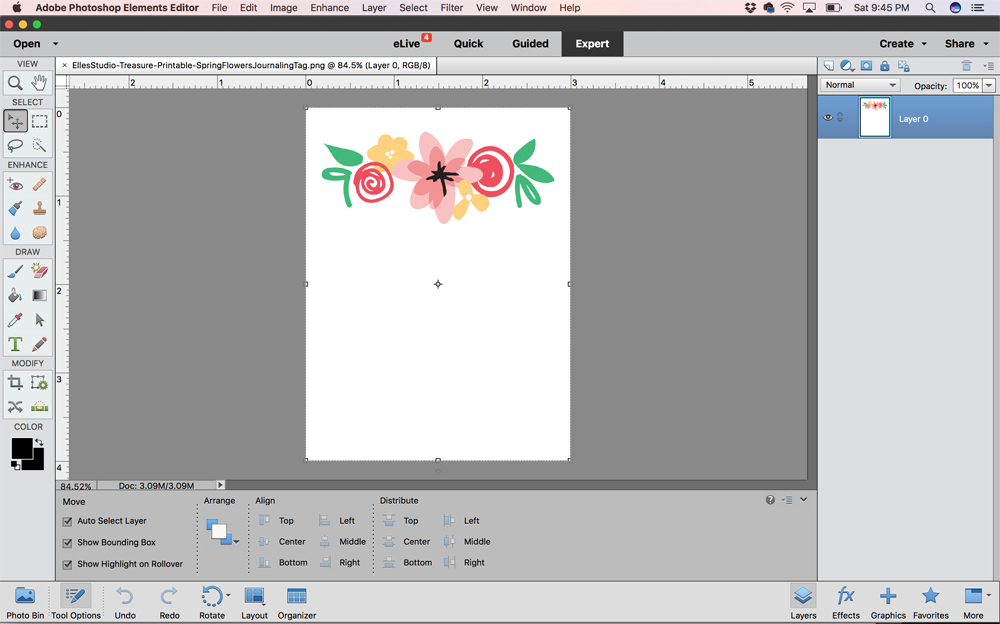
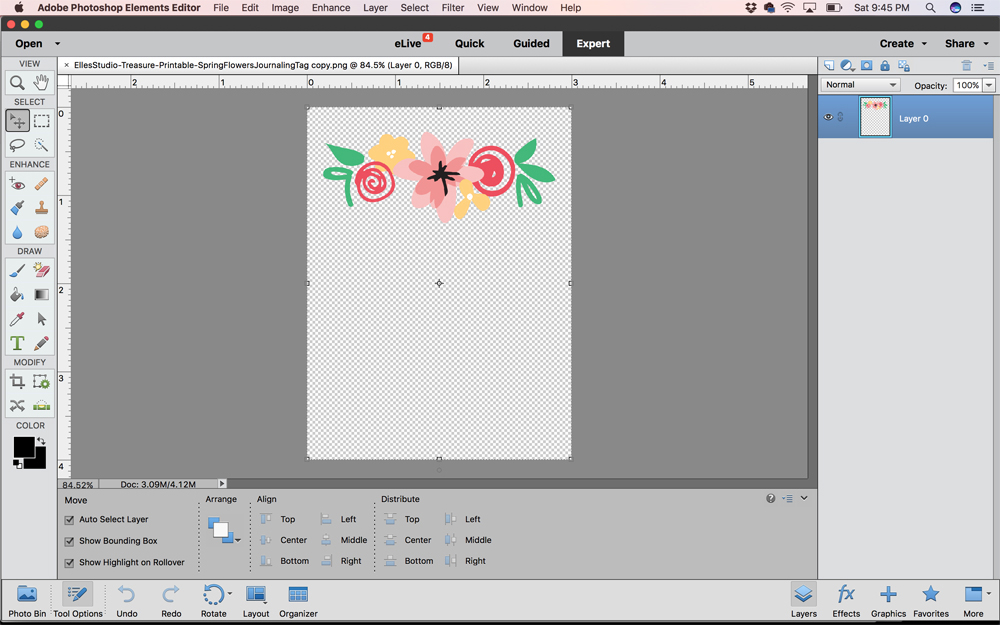
Next, I erased the background of the image using the magic eraser tool, being sure to erase the border of the tag too, leaving the background transparent.
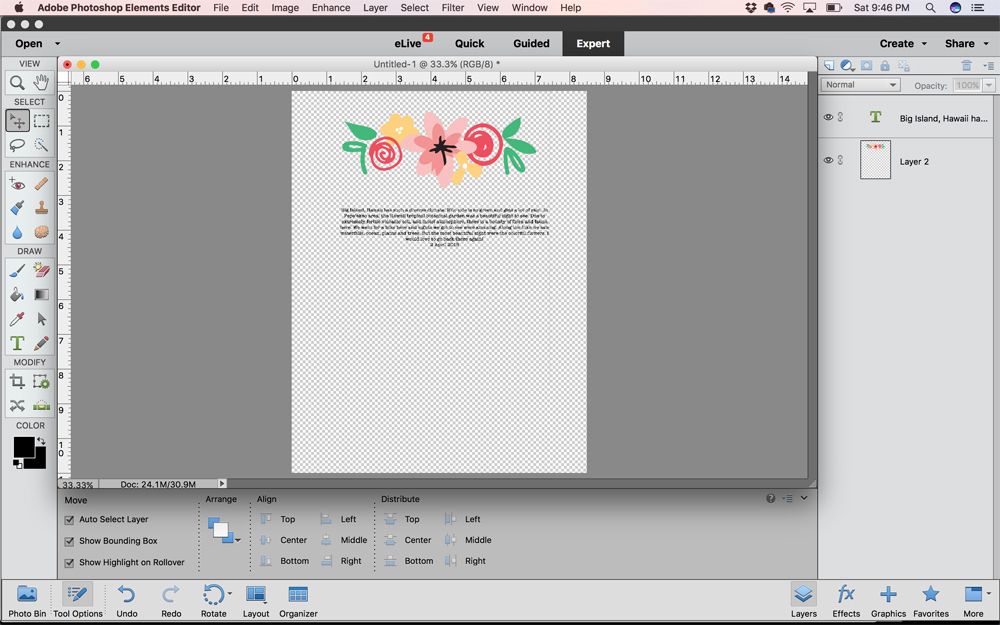
I converted this tag to a size of 8-1/2″ x 11″ by creating a new blank file, sized at 8-1/2″ x 11″, with a transparent background. Then I dragged the tag with the transparent background into this file. I then resized to make the flowers at the top of the page as big or small as I wanted, drew my text box and typed my journaling. At this point I was ready to print the file.
Then, I printed my photos in a grid and glued them below the journaling. I loved the flowers on the tag but couldn’t stop myself from using the acrylic flowers and leaves from the Spring and Flowers Acrylic. I also decided to stamp the flowers using the File Under Stamp in various colors, fussy cutting them and adding them to the printed flowers on the tag.
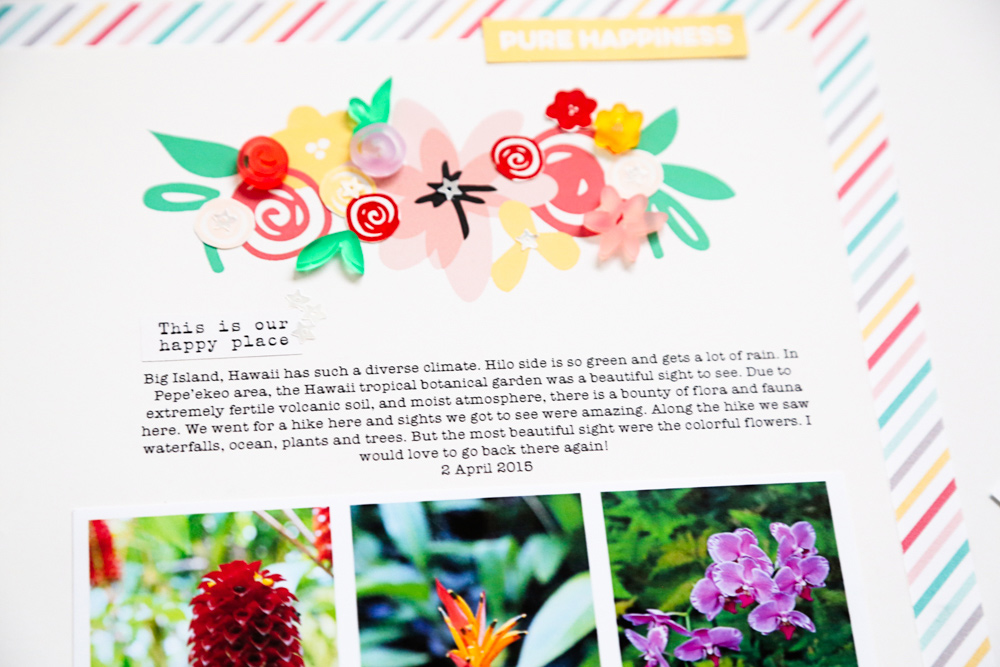
I then wanted to add a title for this layout. What better one than the wood veneer word that says “bloom” from the Grow and Bloom Wood Veneer. I dressed this up with the stamped flowers and leaves too from the File Under Stamp. It was so much fun to do all this stamping!

I then finished the layout with some tags from the March 2017 Kit, stickers from the Today Sticker Labels, Easter Stickers and sequins from the Blue Green Mix. I also converted the 8.5″ x 11″ page to a 9″ x 12″ layout by backing it with a patterned paper from Little Moments 12″ x 12″ Paper Collection.
I hope this project inspires you to modify the Elle’s Studio monthly digital tags to suit your needs. The process is easy and I love that the same tag can be used to create so many different outcomes!