I saw these punched cans that they did for a wedding and I thought how fun would it be to do something like this for Halloween? Well, I’m not going sugar coat it, it was hard! But, in the end, it turned out to have a cool look on our porch, so it might be worth it  Probably easier to just carve the pumpkins, but if you’re looking for a challenge and something different to do this year, then this is the craft for you!
Here’s what you’ll need: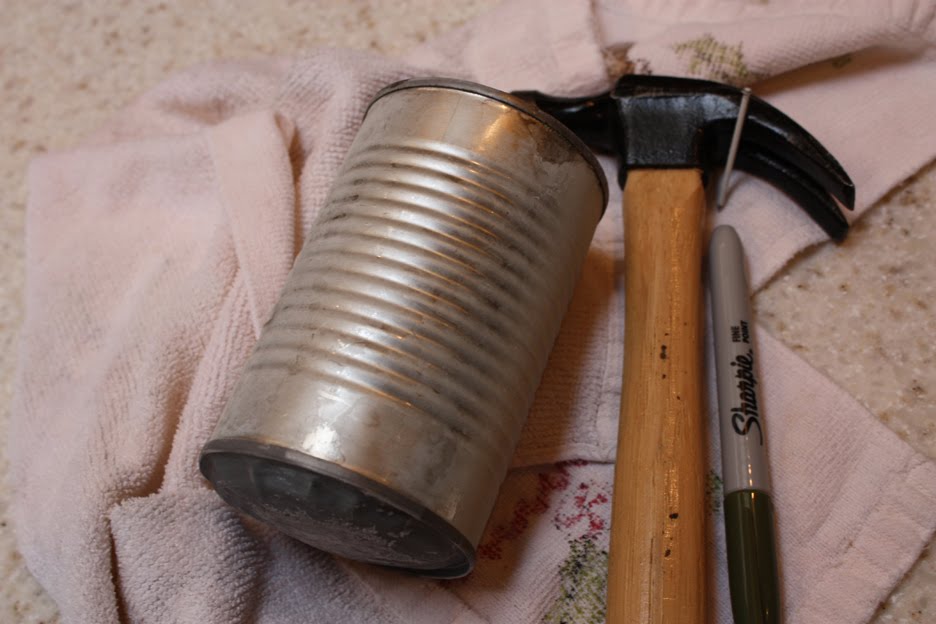 Cans that have frozen water in them (fill all the way to the top and freeze overnight, the bottom will probably pop out, but you can just hammer it back in), hammer, a nail, a Sharpie, and spray paint.
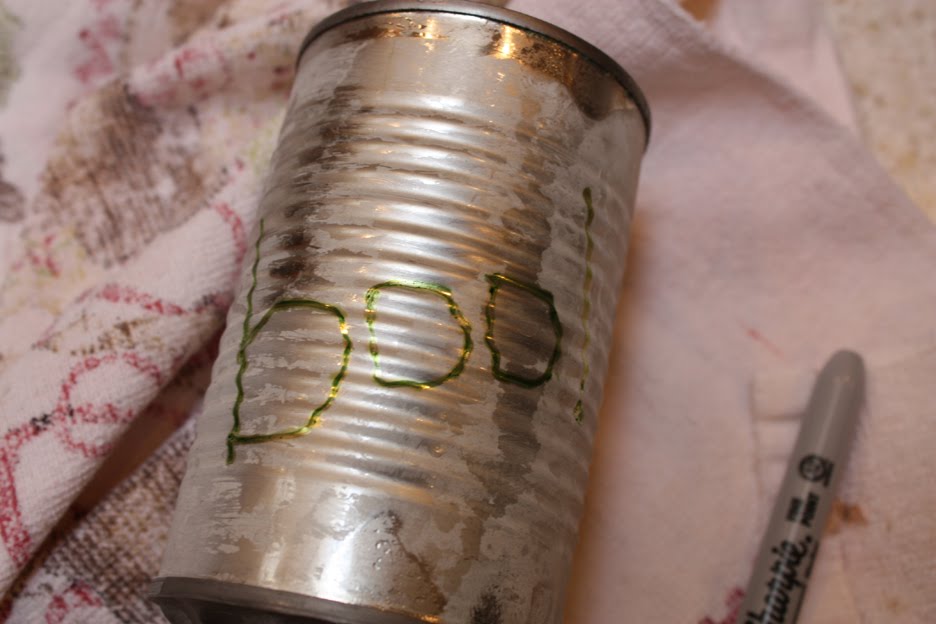 Try to wipe some of the frozen frost on the outside away and draw your word or shape with the Sharpie.
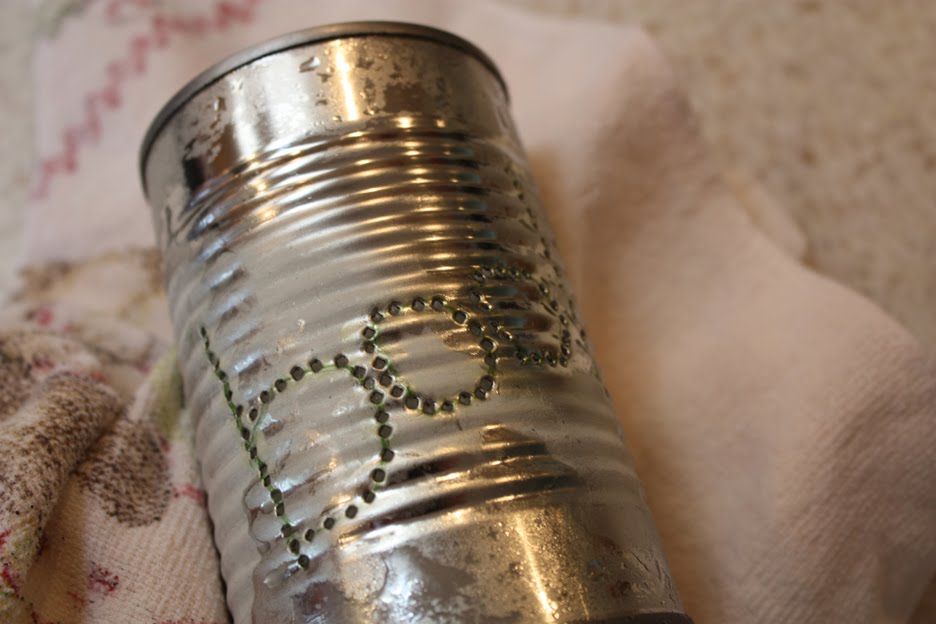 Take the hammer and nail and start punching! Try to get the holes as close together as possible. It’s super hard to punch on the bumpy surface and should probably only be done by an adult.
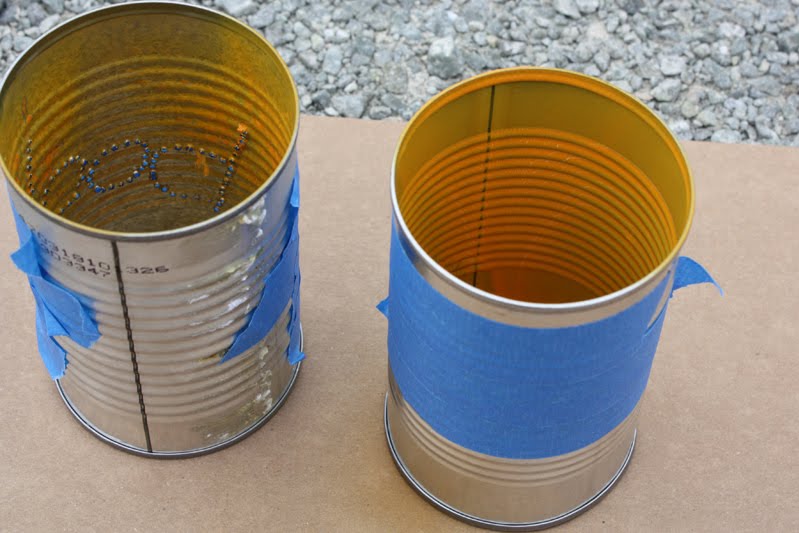 After they are punched, let the ice melt away and take them outside to paint. I painted the inside first, taping off the holes on the outside. Then I painted the outside, taping off the holes on the side. Warning: The holes will be SHARP!
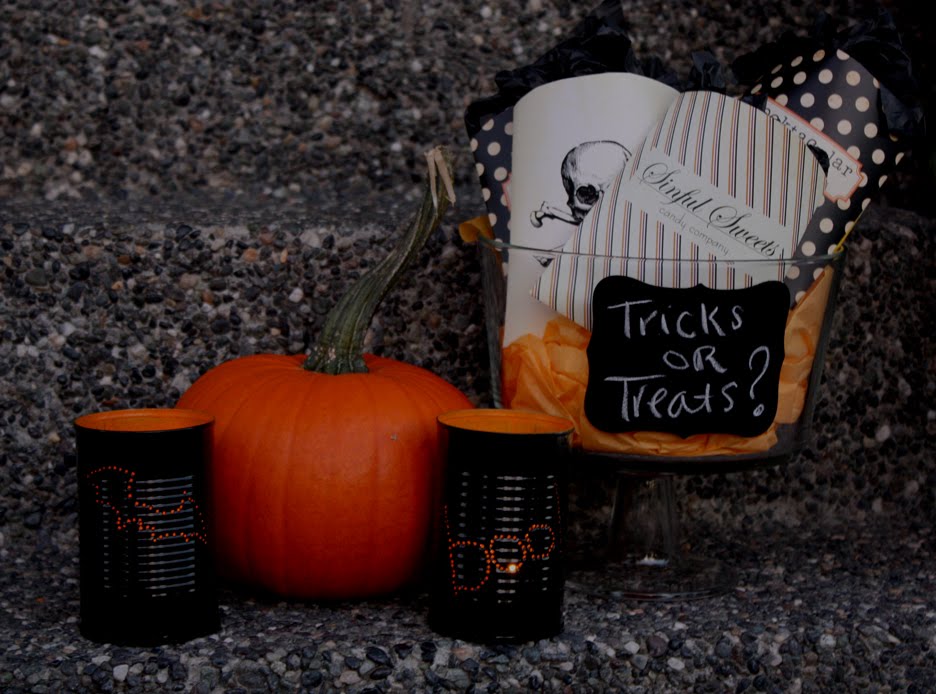 And, here it is on the porch! Like my tricks or treats sign? I got clever this year and found some magic tricks at the dollar store! Some bags are filled with a magic trick for the “tricks” and some are filled with candy for the “treats”! Should be a fun surprise for the kids I used our hybrid Halloween bags!
Hope everyone has a fun and crafty weekend!
xo, Elle
Comments